
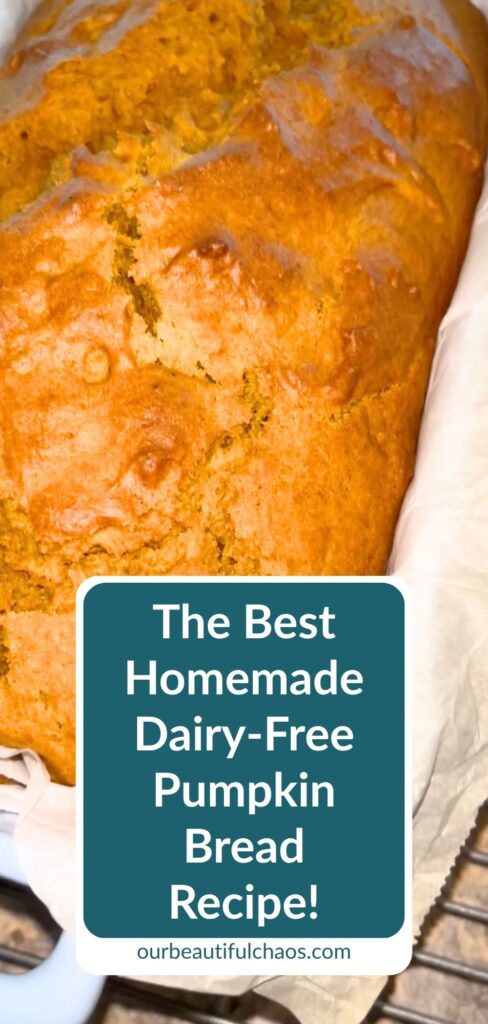
The Best Dairy-Free Pumpkin Bread Recipe (Soft, Moist & Perfect for Fall!)
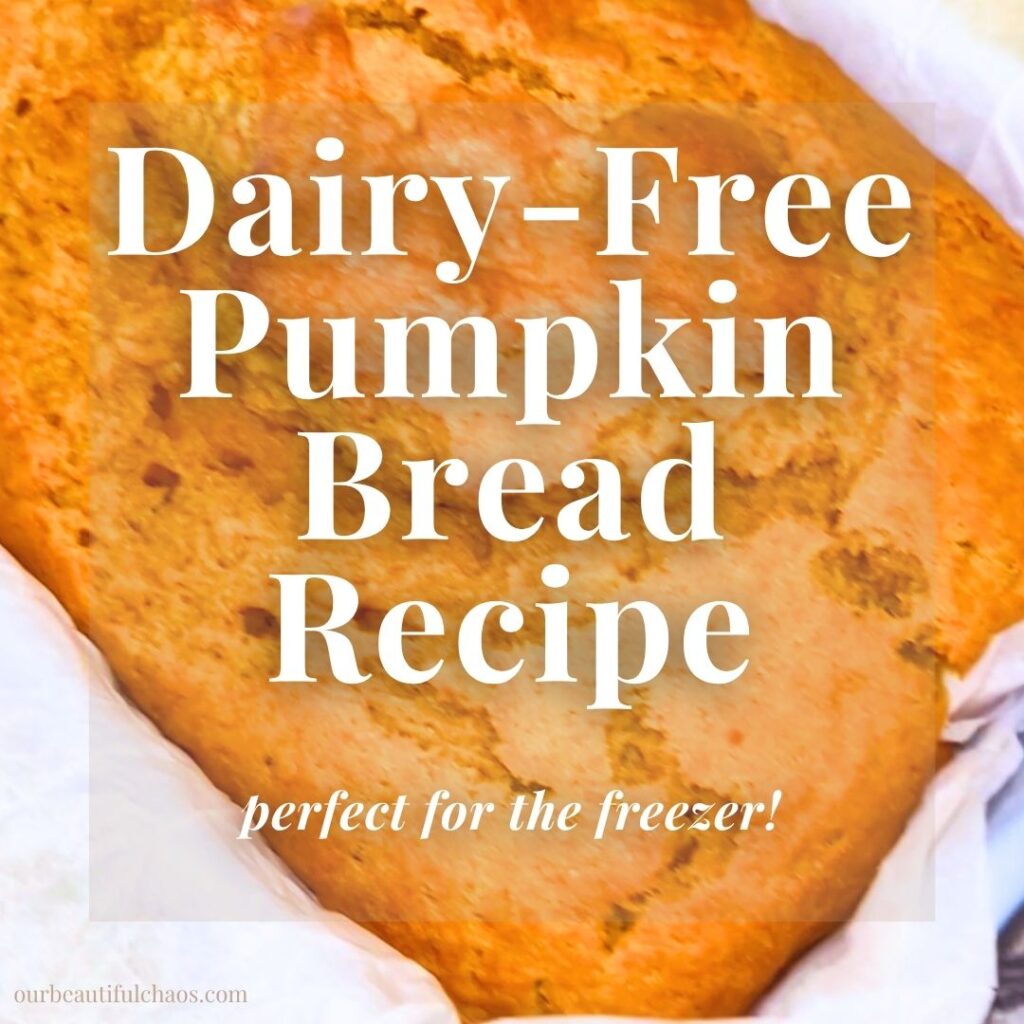
An Easy Homemade Pumpkin Loaf With Real Pumpkin Purée, Warm Spices and No Butter or Milk!
Hi! I’m Julie, a military spouse, mom of three, and the blogger behind Our Beautiful Chaos.
If you’ve been here a while, you’ll know that most of what I share comes from real life in our home. Busy days, military family life, feeding my boys safely, and finding ways to still put good, comforting food on the table without spending my whole day in the kitchen.
In our family, dairy-free living isn’t a choice or a trend. It’s something we navigate every single day because one of my boys has a life-threatening dairy allergy. That means everything I make has to be safe, but it also has to feel normal, filling, and something everyone actually enjoys eating!
That’s why I care so much about recipes like this one. They make it possible for all of us to enjoy the same food together, without worry.
There’s something about fall that makes me want to get into the kitchen and bake something with pumpkin! My boys absolutely love pumpkin recipes, and this homemade dairy-free pumpkin bread is one of those treats that never seems to last very long in our house.
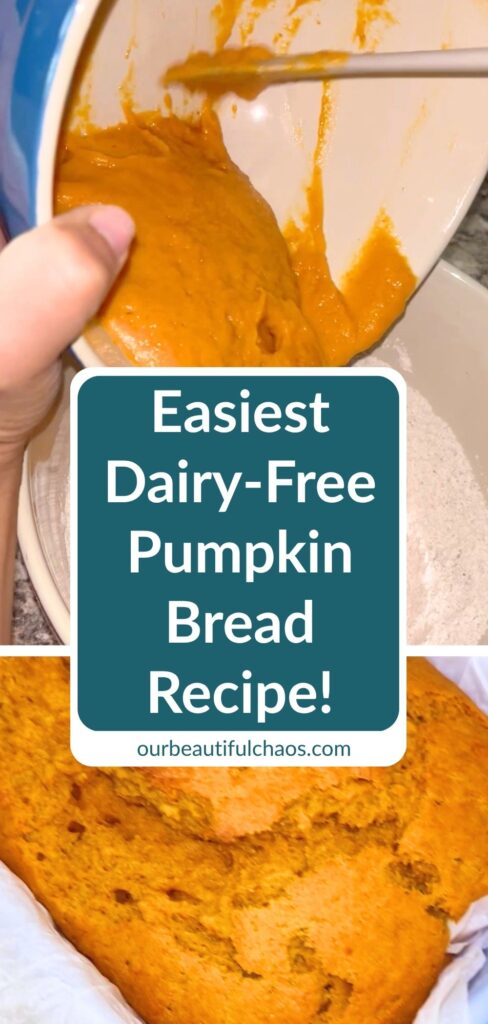
It’s soft, moist, full of warm pumpkin pie spice, and makes the whole kitchen smell wonderful while it’s baking. The boys are usually asking when they can have a slice before it’s even had a chance to cool properly! And honestly, I can’t blame them. A thick slice of pumpkin bread with a cup of coffee on a chilly morning is one of my favorite little things about this time of year.
What I particularly love about this recipe is that you don’t need any specialty dairy-free baking ingredients to make it. There’s no expensive plant-based butter or dairy-free milk to buy. We’re using ordinary vegetable oil, eggs, flour, sugar, and a whole can of pumpkin purée.
The pumpkin and oil help keep the loaf lovely and moist, while the combination of white sugar, brown sugar, and pumpkin pie spice gives it that familiar fall flavor. It’s a simple, comforting homemade treat that just happens to be dairy-free, which is exactly what I want when I’m baking something for the whole family.
And if you’re a military spouse or service member looking for dairy free recipes for military families, I really want to encourage you to give this one a try! Everything I use for this recipe comes from our local commissary right here on base.
Allergy-Friendly
Pumpkin Recipes
No special shopping trips or hunting around for expensive allergy-friendly substitutes. Just regular baking ingredients that are easy to keep in the pantry, along with a can of pumpkin purée.
When you’re feeding three growing boys and trying to keep grocery costs under control, being able to make homemade treats without spending a fortune is always a win in my book!
Another thing I appreciate about pumpkin bread is how versatile it is. We enjoy it as a little breakfast treat, tucked into an afternoon snack, or as something sweet after dinner. It’s also handy when you’ve got a busy week ahead because you can bake a loaf, let it cool, and slice it up ready for everyone to enjoy.
You can even freeze individual slices for later, which is particularly helpful if you’re trying to get ahead with meal prep. Although, with three boys in the house, I have to admit that keeping homemade baked goods around long enough to freeze them can be a challenge!
And you really don’t need to be an experienced baker to make this. We’re simply combining the dry ingredients in one bowl, mixing the wet ingredients in another, and bringing everything together before baking it in a loaf pan.
The biggest things to remember are not to overmix the batter and to give the bread enough time to bake through the middle. Pumpkin adds plenty of moisture, which is wonderful for keeping the loaf soft, but it also means you want to check that the center is properly cooked before taking it out of the oven.
I’ll walk you through everything below, including what to look for if your pumpkin bread is browning too quickly or taking longer than expected.
Now let’s head into the kitchen and make this together!
Our Beautiful Chaos – Recipe Disclaimer
All recipes are shared as a guide based on what works in my home kitchen. Results may vary.
It is your responsibility to check all ingredients for allergies, intolerances, or dietary needs before cooking. Our Beautiful Chaos is not responsible for any reactions or outcomes from the use of these recipes.
Nutritional information is an estimate only.
– Julie from Our Beautiful Chaos
Sneak Peak!
Here is a quick glimpse of the recipe!
Equipment
You don’t need any fancy kitchen equipment for this dairy-free pumpkin bread. Everything can be mixed by hand, and most of the equipment is probably already sitting in your kitchen cupboards!
Available on Amazon.com [ad]
- Two Mixing Bowls: You’ll need one medium bowl for the dry ingredients and one larger bowl for combining the pumpkin purée, sugars, vegetable oil, eggs, and vanilla extract. Having two bowls makes it much easier to combine everything evenly without overmixing.
- Measuring Cups and Spoons: Accurate measurements matter when baking, especially for the flour, baking powder, and baking soda. I recommend using proper measuring cups rather than guessing quantities.
- Whisk: For mixing the dry ingredients together and combining the wet ingredients until smooth. There’s no need to get out a stand mixer for this recipe.
- Silicone Spatula: Useful for gently incorporating the flour mixture into the pumpkin mixture and scraping every last bit of batter into the loaf pan.
- Can Opener: For opening your 15 oz can of pumpkin purée.
- Loaf Pan: A standard loaf pan is all you need. A 9 x 5-inch loaf pan is a practical choice for this amount of batter, although baking time can vary depending on the dimensions and material of your pan.
- Parchment Paper: For lining the loaf pan so the bread is easier to remove once it’s baked. Leaving a little parchment overhanging the sides makes lifting the loaf out much easier.
- Toothpicks or Wooden Skewers: For checking whether the center of the bread is fully baked.
- Wire Cooling Rack: For allowing air to circulate around the loaf as it cools, helping prevent excess moisture from collecting underneath.
Ingredients
Makes 1 loaf, approximately 10 slices depending on how thickly you cut them.
- 1 3/4 cups all-purpose flour
- 1 tablespoon pumpkin pie spice
- 1 teaspoon baking powder
- 1/2 teaspoon baking soda
- 1/4 teaspoon salt
- 1 can (15 oz) pumpkin purée
- 1/2 cup granulated sugar
- 1/2 cup brown sugar, packed
- 3/4 cup vegetable oil
- 2 large eggs
- 1 teaspoon vanilla extract
A Closer Look at the Ingredients
- All-Purpose Flour: We’re using 1 3/4 cups of regular all-purpose flour. There’s no need for expensive specialty flour or a premade baking mix. All-purpose flour provides the structure that helps the pumpkin bread hold together while keeping the finished loaf tender. For the most accurate measurement, spoon the flour into your measuring cup and level it off rather than scooping directly from the bag. Packing in too much flour can make the bread heavier and drier than intended.
- Pumpkin Pie Spice: One tablespoon of pumpkin pie spice gives this bread its lovely warm autumn flavor. Most pumpkin pie spice blends contain cinnamon, ginger, nutmeg, and cloves or allspice, although the exact combination varies by brand. Using a premixed blend keeps things simple and means you don’t have to measure several individual spices every time you want to bake a loaf.
- Baking Powder: One teaspoon of baking powder helps the pumpkin bread rise as it bakes. Make sure yours is fresh, particularly if it’s been sitting in the pantry for a while. Older baking powder can lose its effectiveness, which may leave you with a loaf that doesn’t rise as well as expected.
- Baking Soda: We’re also using 1/2 teaspoon of baking soda. It works alongside the baking powder to help the bread rise and develop its texture. Make sure to measure it carefully, as adding too much can leave an unpleasant taste in the finished bread.
- Salt: Just 1/4 teaspoon of salt helps balance the sweetness and brings out the pumpkin and spice flavors. It might seem like a small amount, but it makes a difference in sweet baked goods.
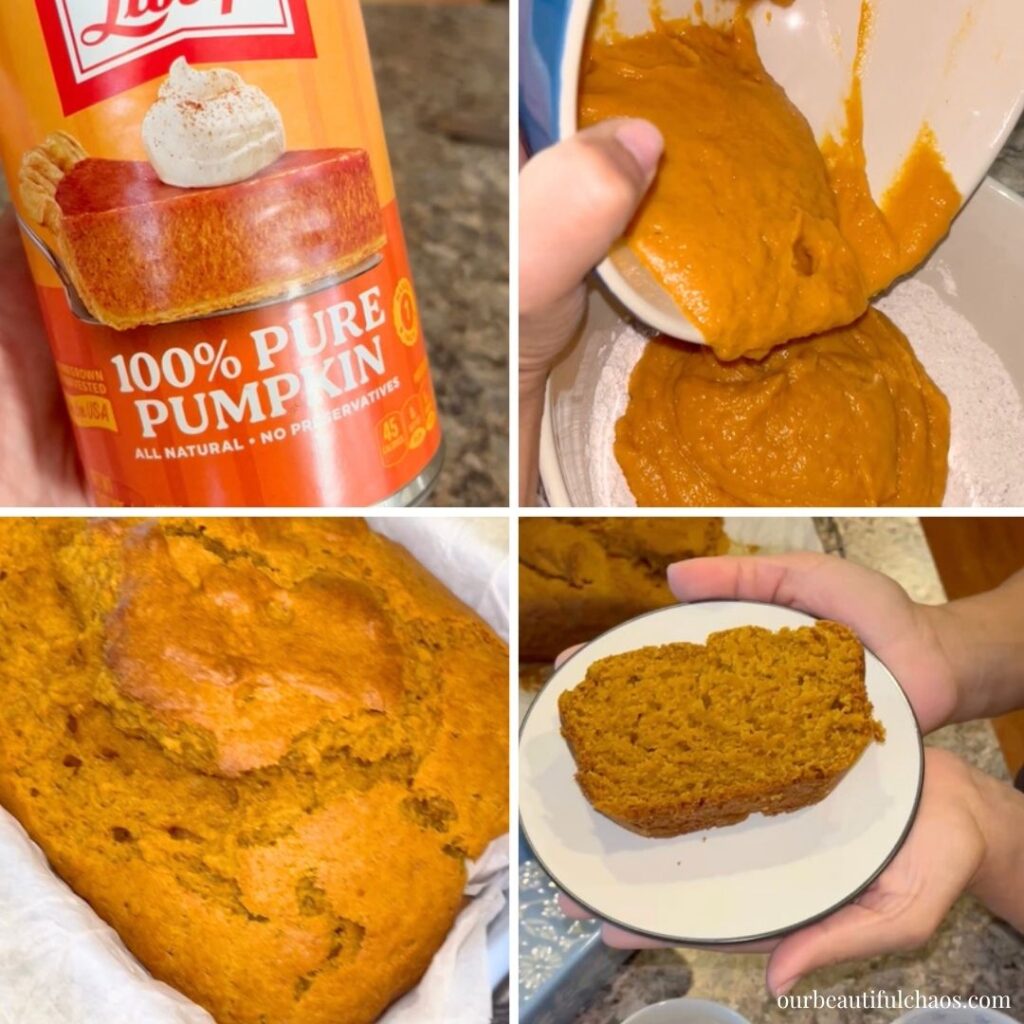
- Pumpkin Purée: We’re using one full 15 oz can of pumpkin purée. Make sure you choose 100% pure pumpkin purée, not pumpkin pie filling. Pumpkin pie filling already contains added sugar and spices, which would change the flavor and sweetness of the recipe. The pumpkin adds moisture, color, and that lovely pumpkin flavor, while also contributing some dietary fiber and nutrients. Using the entire can means you won’t have half a tin of pumpkin sitting in the refrigerator afterward!
- Granulated Sugar: Half a cup of ordinary white granulated sugar adds sweetness and helps create a tender loaf. There’s no need for any specialty sweeteners here.Brown Sugar: We’re also using 1/2 cup of packed brown sugar. Brown sugar contains molasses, which gives it a deeper flavor that works particularly well with pumpkin pie spice. It also contributes moisture to the bread. Make sure to pack the sugar into your measuring cup before leveling it off.
- Vegetable Oil: This recipe uses 3/4 cup of vegetable oil instead of butter, which is one of the reasons it’s so convenient for dairy-free baking. The oil helps keep the loaf soft and moist without requiring an expensive dairy-free butter substitute. Choose a neutral-flavored vegetable oil so the pumpkin and spices remain the main flavors.
- Eggs: Two large eggs help bind the ingredients together and give the loaf structure as it bakes. They also contribute to the bread’s texture. Remember that while this recipe is dairy-free, it isn’t egg-free or vegan.
- Vanilla Extract: One teaspoon of vanilla extract adds a little warmth and sweetness to the overall flavor. It complements the pumpkin pie spice and brown sugar without overpowering them.
Step-by-Step Instructions

This homemade dairy-free pumpkin bread is wonderfully straightforward to make. You don’t need a stand mixer, any complicated baking techniques, or expensive dairy-free substitutes. Just two mixing bowls, a whisk, and a loaf pan!
The most important things to remember are to measure your ingredients carefully, avoid overmixing the batter, and make sure the center of the loaf is properly baked before removing it from the oven.
Step 1: Mix the Dry Ingredients

In a medium mixing bowl, add:
- 1 3/4 cups all-purpose flour
- 1 tablespoon pumpkin pie spice
- 1 teaspoon baking powder
- 1/2 teaspoon baking soda
- 1/4 teaspoon salt
Whisk everything together until the ingredients are evenly combined.
Make sure the baking powder, baking soda, and pumpkin pie spice are distributed throughout the flour. This helps the bread rise evenly and prevents pockets of spice or leavening agents in the finished loaf.
If you notice any large lumps in the flour, break them up with your whisk.
Set the bowl aside while you prepare the wet ingredients.
Step 2: Mix the Wet Ingredients

In a separate large mixing bowl, add:
- 1 can (15 oz) pumpkin purée
- 1/2 cup granulated sugar
- 1/2 cup packed brown sugar
- 3/4 cup vegetable oil
- 2 large eggs
- 1 teaspoon vanilla extract
Whisk everything together until the mixture is smooth and the ingredients are thoroughly combined.
The pumpkin purée should be evenly incorporated with the oil, eggs, and sugars.
If your brown sugar has formed any large lumps, use your whisk to break them apart.
The mixture should look thick, smooth, and orange in color.
Step 3: Combine the Wet and Dry Ingredients
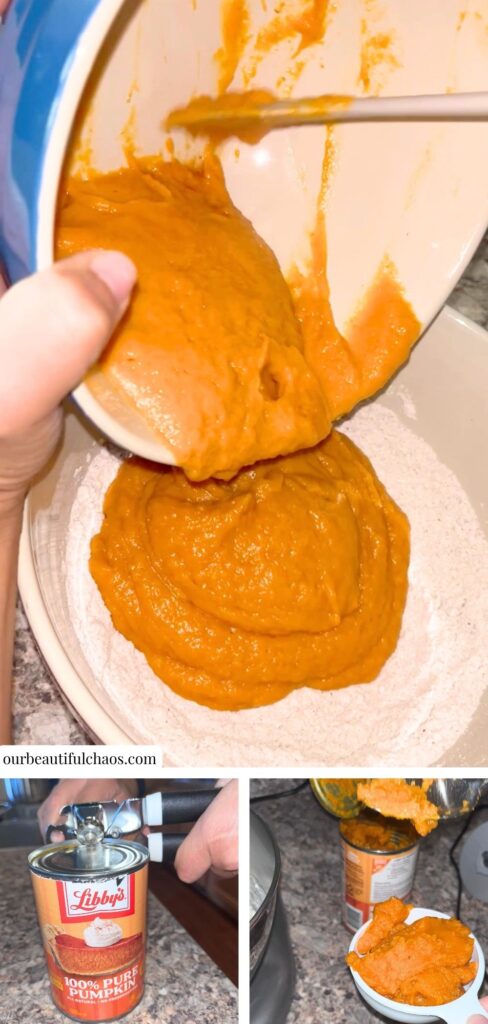
Pour the wet pumpkin mixture into the bowl containing the dry ingredients.
Using a silicone spatula, gently stir everything together until the flour is incorporated and you can no longer see large pockets of dry ingredients.
Don’t overmix the batter!

This is one of the most important things to remember when making pumpkin bread.
Once flour comes into contact with liquid, mixing begins developing gluten. A little gluten gives the bread structure, but excessive mixing can make the finished loaf tougher and denser than you want.
You don’t need to beat the batter until it’s perfectly smooth.
A few small lumps are fine, provided there are no large pockets of dry flour remaining.
The finished batter should be thick but soft enough to spread into your loaf pan.
Step 4: Preheat the Oven and Prepare Your Loaf Pan

Preheat your oven to 350°F (175°C).
While the oven heats, line your loaf pan with parchment paper.
I recommend leaving a little parchment paper hanging over the two longer sides of the pan. This gives you something to hold when it’s time to lift the finished bread out. I like to crinkle up my parchment paper before placing it into the pan because it stays put a little better.
Make sure the parchment sits neatly inside the pan, particularly around the bottom corners.
A standard 9 x 5-inch loaf pan is a practical choice for this recipe. If you’re using a smaller or deeper pan, the bread may need additional baking time.
Step 5: Transfer the Batter to the Loaf Pan
Pour the prepared pumpkin bread batter into your parchment-lined loaf pan.
Use your silicone spatula to scrape the remaining batter from the mixing bowl.
Gently spread the batter so it sits reasonably evenly across the pan.
You don’t need to press it down or repeatedly tap the pan against the counter.
Just make sure the batter is distributed evenly so the loaf can bake as consistently as possible.
Step 6: Bake the Pumpkin Bread

Place the loaf pan on the center rack of your preheated oven.
Bake at 350°F for approximately 55 to 65 minutes, or until the bread is cooked through.
Because pumpkin bread contains plenty of moisture, it’s important to check the center rather than relying on the appearance of the crust.
Start checking for doneness around the 55-minute mark.
Insert a toothpick or wooden skewer into the thickest part of the loaf.
If it comes out clean or with a few moist crumbs attached, the bread is ready.
If you see wet batter on the toothpick, return the loaf to the oven and continue baking, checking again after approximately 5 minutes.
The top should look set, and the center shouldn’t appear wet or wobble when you gently move the pan.
If the top is browning too quickly but the middle still needs more time, loosely cover the loaf with aluminum foil and continue baking.
Avoid opening the oven repeatedly during the early part of baking, as unnecessary temperature fluctuations can affect how the loaf rises.
Step 7: Cool the Pumpkin Bread Before Slicing

Once the pumpkin bread is fully baked, carefully remove the loaf pan from the oven.
Allow the bread to cool in the pan for approximately 10 minutes.
This gives the loaf a little time to firm up before you attempt to remove it.
After 10 minutes, use the overhanging parchment paper to carefully lift the bread out of the pan and transfer it to a wire cooling rack.
Allow the loaf to finish cooling before slicing.
I know how tempting it is to cut into warm pumpkin bread, especially when the kitchen smells so good, but giving it time to cool makes a difference!
Pumpkin bread contains a lot of moisture, and the crumb continues to set as it cools.
Cutting it too early can make the center appear gummy and cause the slices to crumble or tear.
Once cooled, slice the bread using a sharp serrated knife and enjoy!
Notes
Pumpkin bread is generally a forgiving recipe, but because we’re working with a whole can of pumpkin purée, there are a few things worth knowing.
Pumpkin adds wonderful moisture, but it also means the loaf needs enough time in the oven to cook through properly.
Here are my tips for getting the best results, along with solutions to some of the most common pumpkin bread problems.
- Use Pure Pumpkin Purée: Make sure you’re using 100% pumpkin purée rather than pumpkin pie filling. Pumpkin pie filling already contains sugar and spices, so substituting it would change the recipe.
- Measure Your Flour Carefully: Too much flour can make pumpkin bread dry and heavy. Spoon the flour into your measuring cup and level it off rather than packing it down.
- Check Your Baking Powder and Baking Soda: Both help the loaf rise. Make sure they’re fresh and measured accurately.
- Use a Neutral-Flavored Oil: Regular vegetable oil works well because it doesn’t compete with the pumpkin and spice flavors.
- Don’t Overmix: Once you’ve combined the wet and dry ingredients, stir gently until the flour is incorporated. Excessive mixing can produce a tougher loaf.
- Use the Correct Loaf Pan: The size and material of your pan affect how quickly the bread bakes. A smaller, deeper pan generally requires more time than a wider pan.
- Check the Center Before Removing: Pumpkin bread can look beautifully golden on the outside while still being underbaked in the middle. Always test the thickest part of the loaf.
- Allow the Bread to Cool: Let the loaf rest in the pan for 10 minutes before transferring it to a cooling rack. Wait until it’s cooled before slicing for the neatest results.
- Check Your Ingredient Labels: Although this recipe doesn’t contain milk or butter, always verify that your packaged ingredients are suitable for your family’s allergies and check for potential cross-contact warnings.
Troubleshooting
A gummy center is one of the most common problems with pumpkin bread.
Pumpkin purée contains a significant amount of moisture, so the center can take longer to bake than you might expect.
If the outside looks finished but the middle is wet or sticky, the loaf may simply need more time in the oven.
How to fix it:
Check the center with a toothpick or wooden skewer before removing the bread.
If wet batter remains, continue baking in 5-minute increments.
If the top is becoming too dark, loosely cover it with aluminum foil while the center finishes baking.
Also, make sure you allow the bread to cool before slicing. Cutting into a hot loaf can make the crumb seem gummy even when it’s properly baked.
A pumpkin loaf can sink when its structure hasn’t fully set before it’s removed from the oven.
This can happen if the center is underbaked or if the oven door is opened too frequently during baking.
Too much baking powder or baking soda can also cause a loaf to rise excessively before collapsing.
How to fix it:
Measure your leavening ingredients carefully and avoid opening the oven unnecessarily during the early stages of baking.
Always check the center before removing the loaf.
If your bread consistently sinks despite following the recipe, check your oven temperature with an oven thermometer. Some ovens run hotter or cooler than their settings suggest.
Pumpkin bread should be moist and tender, so a dry loaf usually indicates too much flour, excessive baking, or inaccurate ingredient measurements.
How to fix it:
Use the spoon-and-level method when measuring flour.
Start checking the bread at 55 minutes rather than automatically leaving it in for the full 65 minutes.
Remember that ovens and loaf pans vary, so the exact baking time may differ.
Remove the loaf once the center is cooked through rather than continuing to bake it unnecessarily.
This recipe contains a whole can of pumpkin purée, so the loaf will naturally have a moist, substantial texture.
However, it shouldn’t be unpleasantly heavy or rubbery.
Overmixing the batter can develop too much gluten, while expired baking powder or baking soda can prevent the bread from rising properly.
How to fix it:
Mix the wet and dry ingredients just until combined.
Check that your baking powder and baking soda are fresh.
Measure the flour accurately and avoid adding extra flour just because the batter looks thick.
A crack along the top of a quick bread loaf is completely normal!
As the bread bakes, the outside begins setting while the batter underneath continues expanding.
This often creates a split across the top.
You don’t need to fix anything.
A cracked top doesn’t mean your pumpkin bread has gone wrong.
Simply check that the center is fully baked before removing the loaf from the oven.
If the top is becoming dark before the center has finished baking, your oven may be running hot or your loaf pan may be affecting how quickly the outside cooks.
How to fix it:
Loosely cover the loaf with aluminum foil once the top has developed enough color.
Continue baking until the center passes the toothpick test.
If this happens regularly, check your oven temperature with an oven thermometer.
A soggy bottom can happen when moisture becomes trapped between the loaf and the pan.
Leaving the finished bread sitting in its hot pan for too long can allow condensation to collect as it cools.
How to fix it:
Allow the bread to rest in the pan for approximately 10 minutes, then transfer it to a wire cooling rack.
Make sure air can circulate underneath the loaf while it cools.
Avoid wrapping or storing the bread while it’s still warm.
An unpleasant aftertaste can sometimes come from using too much baking soda or baking powder.
These ingredients need to be measured accurately and distributed evenly throughout the batter.
How to fix it:
Measure the baking powder and baking soda with proper measuring spoons.
Level each spoon rather than using a heaping measurement.
Whisk the dry ingredients thoroughly before adding the wet mixture.
Also, check that you’re using the correct ingredients and haven’t accidentally substituted baking soda for baking powder.
Pumpkin bread is moist, so removing it from an unlined pan can sometimes be difficult.
How to fix it:
Line the loaf pan with parchment paper before adding the batter.
Leave enough parchment overhanging the sides to lift the loaf out once it has rested for 10 minutes.
If the parchment is sticking to the bread, allow the loaf to cool a little longer before gently peeling it away.
If the loaf is still hot, the crumb may not have finished setting.
Trying to slice it immediately can cause the bread to tear or fall apart.
How to fix it:
Allow the pumpkin bread to cool completely on a wire rack before slicing.
Use a sharp serrated knife and a gentle sawing motion rather than pressing straight down through the loaf.
If the bread is still crumbling after cooling, check that you haven’t used too much flour or baked it for too long.
If your pumpkin bread comes out unusually flat, the baking powder or baking soda may have lost some of its effectiveness.
Excessive mixing can also affect the finished texture.
How to fix it:
Use fresh baking powder and baking soda, and make sure they’re evenly distributed throughout the flour.
Avoid overmixing the batter once the wet and dry ingredients are combined.
Also, remember that pumpkin bread is naturally denser than a light sponge cake, so you shouldn’t expect it to rise in quite the same way.
Storage
Whether you’re planning breakfast treats, packing snacks, or stocking the freezer, proper storage helps keep the bread soft and moist.
How to Store Pumpkin Bread at Room Temperature
- Allow the pumpkin bread to cool completely before storing it. Wrap the loaf tightly or place individual slices in an airtight container.
- Store at room temperature for up to 2 days, provided your kitchen is reasonably cool.
How to Store Pumpkin Bread in the Refrigerator
- Once cooled, wrap the pumpkin bread tightly or place it in an airtight container.
- Store in the refrigerator for up to 5 to 7 days.
- Keeping the loaf wrapped helps prevent it from drying out or absorbing odors from other foods.
- You can enjoy it chilled or allow individual slices to come to room temperature before serving.
How to Freeze Dairy-Free Pumpkin Bread?
To freeze the whole loaf:
- Allow the pumpkin bread to cool completely.
- Wrap the loaf tightly in plastic wrap.
- Add a second layer of aluminum foil or place it inside a freezer-safe bag.
- Label with the recipe name and date.
- Freeze for up to 2 months for best quality.
To freeze individual slices:
- Allow the loaf to cool completely.
- Cut into individual slices.
- Separate the slices with small pieces of parchment paper or wrap them individually.
- Transfer to a freezer-safe container or bag.
- Freeze for up to 2 months for best quality.
Freezing individual slices is particularly handy when you only want to take out enough for breakfast or an afternoon snack.
How to Thaw Frozen Pumpkin Bread
- For the best texture, thaw a whole loaf in the refrigerator overnight while keeping it wrapped.
- Individual slices can also be thawed in the refrigerator or at room temperature for a short period.
- If you’d prefer a warm slice, gently heat it in the microwave for a few seconds after thawing.
- Avoid overheating, as this can affect the texture.
Serving Ideas
This dairy-free pumpkin bread is delicious on its own, but there are plenty of ways to enjoy it throughout the day.
- Warm With Dairy-Free Butter: Spread a little dairy-free plant butter over a slice of gently warmed pumpkin bread. It’s especially lovely with your morning coffee.
- With Coffee or Tea: Pumpkin pie spice pairs beautifully with a hot drink, making this a lovely treat on a chilly autumn morning.
- With Fresh Fruit: Serve a slice alongside apple slices, strawberries, or your family’s favorite seasonal fruit for an easy breakfast or snack.
- Toasted: Lightly toast a slice of pumpkin bread and enjoy it warm. Keep an eye on it because the sugar in the bread can cause it to brown quickly.
- With Dairy-Free Cream Cheese: A little dairy-free cream cheese makes a lovely spread for pumpkin bread, particularly if you enjoy a slightly tangy contrast to sweet baked goods.
- As an Afternoon Snack: Cut the loaf into smaller slices and serve with fruit or another simple snack when the kids get home.
- With Dairy-Free Whipped Topping: For a dessert-style treat, serve a slice with a little dairy-free whipped topping and a sprinkle of cinnamon.
- As Part of a Fall Breakfast Spread: Serve alongside scrambled eggs, fresh fruit, and your family’s other favorite breakfast foods.
- For Holiday Breakfasts: Pumpkin bread is a lovely addition to a Thanksgiving morning breakfast or a relaxed fall weekend brunch.
- As a Homemade Gift: Wrap a completely cooled loaf neatly and share it with friends or neighbors, making sure they know which allergens the recipe contains.
Optional Add-Ins and Variations
If you want to change things up occasionally, there are a few simple additions you can experiment with…
- Dairy-Free Chocolate Chips: Fold approximately 1/2 cup into the finished batter for a chocolate pumpkin bread variation.
- Chopped Walnuts or Pecans: Add approximately 1/2 cup for a little crunch, provided nuts are safe for everyone eating the bread.
- Cinnamon Sugar Topping: Sprinkle a small amount of cinnamon sugar over the batter before baking for a sweet, lightly textured top.
- Pumpkin Seeds: Sprinkle a few pumpkin seeds over the top before baking for a little extra texture.
- Extra Cinnamon: If your family particularly enjoys cinnamon, you can add a small additional pinch alongside the pumpkin pie spice.
These are optional variations rather than changes to the original recipe. Additional ingredients may affect the texture or baking time, so check that the center is fully baked.
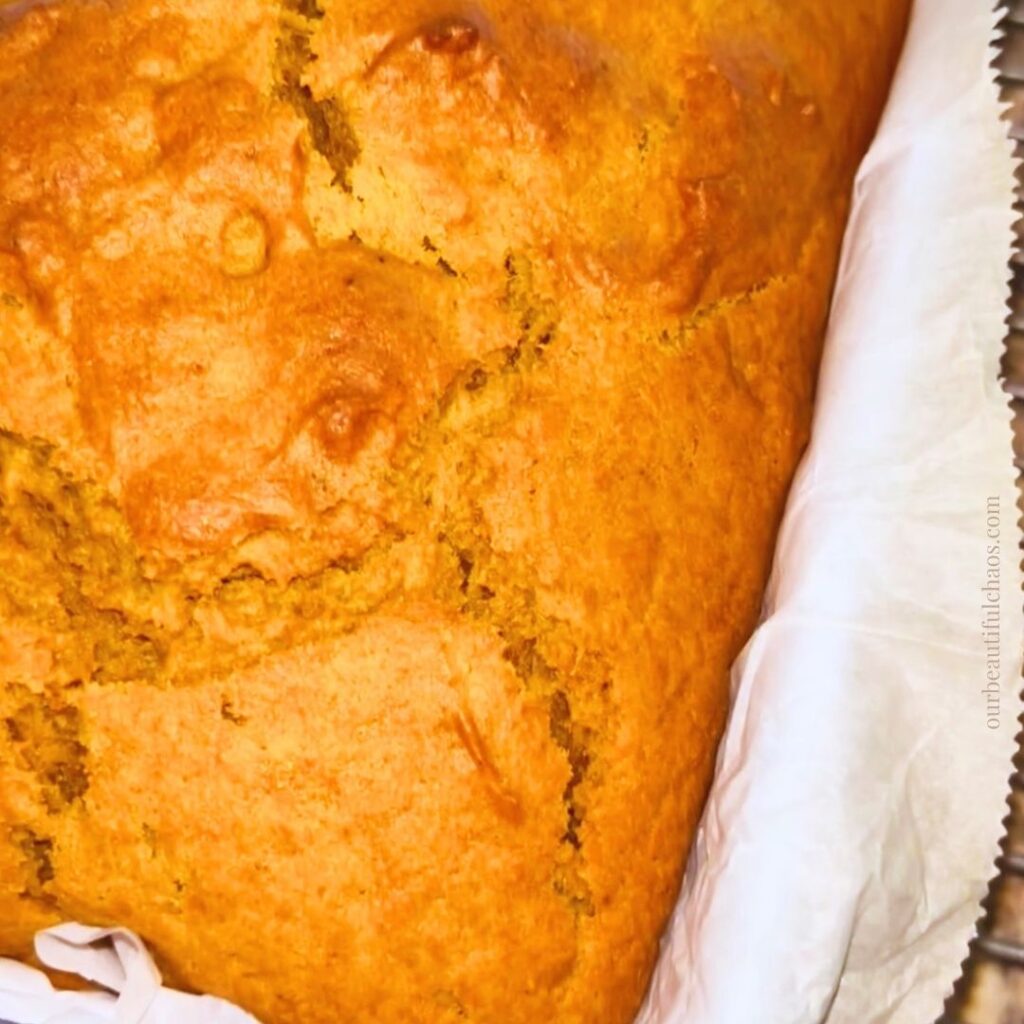
Why You’ll Love This Recipe?!
- It’s Completely Dairy-Free! This pumpkin bread doesn’t require milk, butter, cream, or any other dairy ingredients. It’s made using ordinary vegetable oil, making it a convenient option for families managing dairy allergies.
- No Expensive Dairy-Free Substitutes! You don’t need specialty plant-based butter or milk to make this recipe. Everything is made using familiar pantry ingredients.
- It’s Perfect for Fall! Real pumpkin purée and a generous tablespoon of pumpkin pie spice give this loaf plenty of cozy autumn flavor.
- It’s Soft and Moist! The combination of pumpkin purée, vegetable oil, and brown sugar helps create a tender loaf that stays moist.
- It’s Easy to Make! You only need two mixing bowls, a whisk, a spatula, and a loaf pan. No stand mixer required!
- It Uses a Whole Can of Pumpkin! There’s no awkward leftover pumpkin purée to figure out how to use.
- It’s Budget-Friendly! Most of the ingredients are inexpensive pantry staples that you can find at the grocery store or military commissary.
- It’s Great for Breakfast or Snacks! Enjoy it with coffee in the morning, serve it as an afternoon treat, or add it to a fall dessert spread.
- It’s Freezer-Friendly! You can freeze the whole loaf or individual slices for convenient make-ahead treats.
- The Whole Family Can Enjoy It! It’s a familiar homemade baked good that everyone can share without needing to make a separate dairy-containing version.
FAQ’s
This particular recipe uses two large eggs to help bind the ingredients together and give the loaf structure.
If you need an egg-free version, you could experiment with a commercial egg replacer designed for baking, following the manufacturer’s instructions for replacing two eggs.
However, I haven’t tested this particular pumpkin bread without eggs, so I can’t guarantee that the texture or rise will be the same.
Pumpkin bread already contains quite a lot of moisture, so replacing the eggs with additional pumpkin or applesauce may make the finished loaf too dense or gummy.
If you’re baking for someone with an egg allergy, always check that your chosen replacement and the remaining ingredients are suitable.
You can experiment with a gluten-free 1:1 baking flour designed to replace regular all-purpose flour.
However, this recipe was developed using ordinary all-purpose flour, and I haven’t tested it with a gluten-free flour blend.
Different gluten-free flours absorb moisture differently, which is particularly important in a recipe containing a whole can of pumpkin purée.
If you’re trying a gluten-free version, choose a blend intended for cakes and quick breads rather than a single-ingredient flour such as almond flour or coconut flour.
Check the manufacturer’s substitution recommendations, and make sure all your ingredients are appropriate for anyone with celiac disease or a gluten allergy.
A mild, neutral-tasting olive oil can work as a substitute for vegetable oil, although you may notice a slight difference in flavor.
Refined coconut oil is another possibility, but it behaves differently because it becomes solid when cool. That can affect the texture of the finished bread, particularly when refrigerated.
For the most predictable results, I recommend sticking with the 3/4 cup of vegetable oil in the original recipe.
It’s affordable, easy to find, and helps keep the pumpkin bread moist without adding dairy.
Yes! You can double the ingredients to prepare two loaves.
For a double batch, you’ll need two 15 oz cans of pumpkin purée, 3 1/2 cups of flour, four eggs, and double the quantities of the remaining ingredients.
Divide the batter evenly between two prepared loaf pans rather than trying to bake everything in one oversized pan.
Place the pans on the same oven rack if there’s enough room for air to circulate around them.
The baking time may be similar to the original 55 to 65 minutes, but it can vary depending on your oven, the pan sizes, and how closely the pans are positioned.
Check each loaf individually for doneness before removing it.
Yes, this batter could also be used to make dairy-free pumpkin muffins, although you’ll need to adjust the baking time.
Line a standard muffin tin with paper liners or lightly grease the cavities with a suitable dairy-free oil.
Divide the batter between the muffin cups, filling each approximately two-thirds to three-quarters full.
Bake at 350°F and begin checking for doneness around 18 to 22 minutes.
The exact baking time and yield will depend on your muffin tin and how much batter you use in each cavity.
Insert a toothpick into the center of a muffin to check that it’s cooked through.
This variation hasn’t been separately tested, so use the suggested timing as a starting point rather than a guaranteed result.
The Best Dairy-Free Pumpkin Bread Recipe
Equipment
- 2 large mixing bowls
- Measuring cups and spoons
- Whisk
- Silicone spatula
- Can opener
- Loaf pan
- Parchment paper
- Toothpick or wooden skewer
- Wire cooling rack
Ingredients
- 1 3/4 cups all-purpose flour
- 1 tbsp pumpkin pie spice
- 1 tsp baking powder
- 1/2 tsp baking soda
- 1/4 tsp salt
- 15 oz pumpkin purée (1 can)
- 1/2 cup granulated sugar
- 1/2 cup brown sugar, packed
- 3/4 cup vegetable oil
- 2 large eggs
- 1 tsp vanilla extract
Instructions
Mix the Dry Ingredients
- In a medium mixing bowl, whisk together the all-purpose flour, pumpkin pie spice, baking powder, baking soda, and salt until evenly combined. Set aside.
Mix the Wet Ingredients
- In a separate large mixing bowl, combine the pumpkin purée, granulated sugar, packed brown sugar, vegetable oil, eggs, and vanilla extract. Whisk until smooth and thoroughly combined.
Combine the Wet and Dry Ingredients
- Pour the wet pumpkin mixture into the bowl containing the dry ingredients. Gently stir with a silicone spatula until the flour is incorporated and no large pockets of dry ingredients remain. Avoid overmixing.
Preheat the Oven and Prepare the Pan
- Preheat the oven to 350°F (175°C). Line a loaf pan with parchment paper, leaving a little overhang on the sides to make removing the finished bread easier.
Transfer the Batter
- Pour the pumpkin bread batter into the prepared loaf pan. Use a silicone spatula to spread the batter evenly across the pan.
Bake the Pumpkin Bread
- Place the loaf pan on the center rack of the preheated oven. Bake for approximately 55 to 65 minutes, or until a toothpick inserted into the center comes out clean or with a few moist crumbs. If wet batter remains, continue baking and check again after approximately 5 minutes. If the top is browning too quickly, loosely cover it with aluminum foil.
Cool Before Slicing
- Remove the pumpkin bread from the oven and allow it to cool in the pan for 10 minutes. Carefully lift the loaf out using the parchment paper and transfer it to a wire cooling rack. Allow it to cool completely before slicing.
Video
Notes
- Pumpkin Purée: Use one 15 oz can of 100% pure pumpkin purée. Do not substitute pumpkin pie filling, which contains additional sugar and spices.
- Flour: Measure the flour using the spoon-and-level method to avoid adding too much.
- Oil: Use a neutral-flavored vegetable oil. This recipe doesn’t require butter or milk.
- Mixing: Stir the wet and dry ingredients together just until combined. Overmixing can produce a dense or tough loaf.
- Loaf Pan: A 9 x 5-inch loaf pan is a practical choice, but pan dimensions and materials affect baking time.
- Baking Time: Begin checking the bread at approximately 55 minutes. The center should be fully baked before removing the loaf.
- Cooling: Allow the bread to rest in the pan for 10 minutes before transferring it to a wire rack. Cool completely before slicing.
- Optional Add-Ins: Try adding approximately 1/2 cup of dairy-free chocolate chips or chopped nuts, provided they’re suitable for your family’s allergies. These variations may affect the finished texture.
- Allergen Safety: Always check ingredient labels and allergen information on packaged products, especially when baking for someone with a life-threatening dairy allergy. Prevent cross-contact by using clean equipment and preparation surfaces.
Storage
- Room Temperature: Store completely cooled pumpkin bread in an airtight container for up to 2 days in a cool kitchen.
- Refrigerator: Wrap tightly or store in an airtight container for up to 5 to 7 days.
- Freezer: Wrap the cooled loaf tightly or freeze individual slices in freezer-safe bags or containers for up to 2 months for best quality.
- Thawing: Thaw frozen pumpkin bread in the refrigerator overnight. Individual slices can be gently warmed after thawing.
Related Recipes
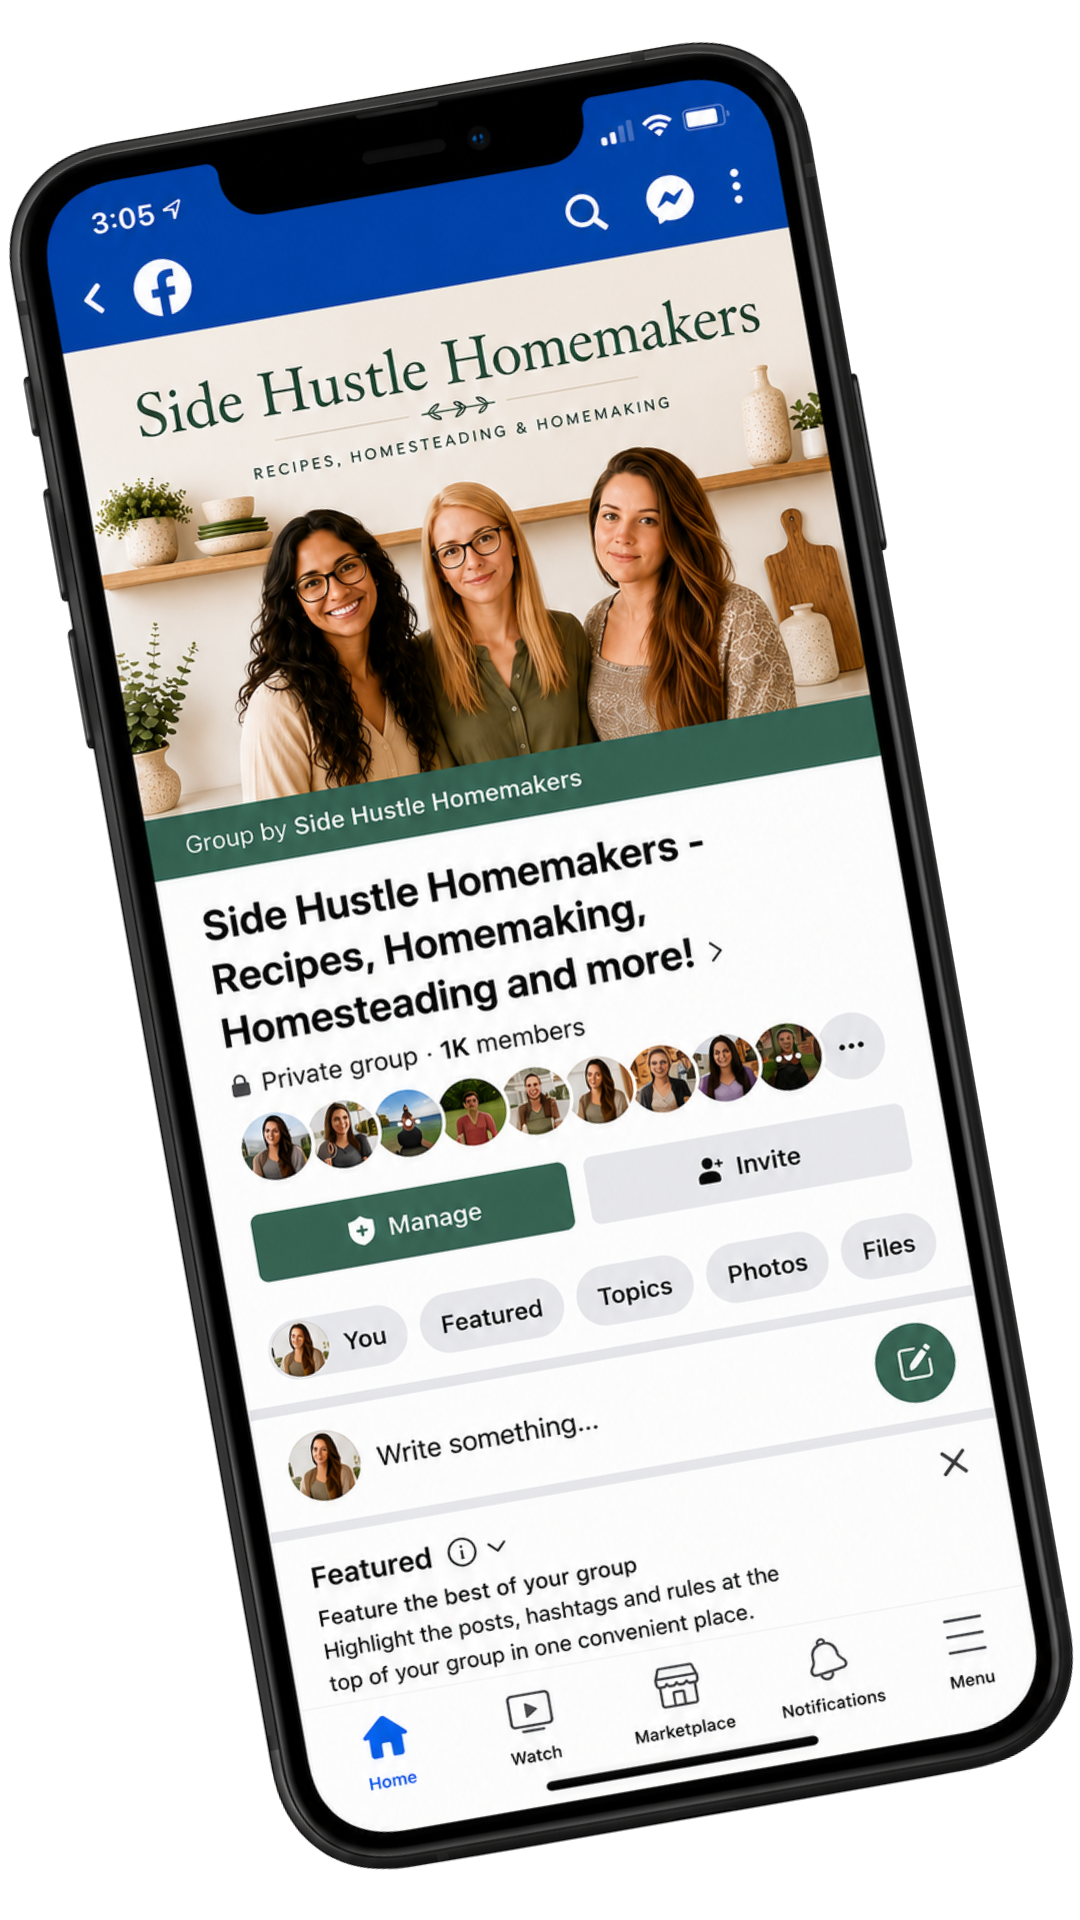
Join our community!
It’s so important to be part of a community that not only understands you but that champions you, encourages, challenges and cheers you on. We couldn’t find one – so we created it instead!
Join the Side Hustle Homemaker’s team Sam, Mona and I over at the Recipes, Homesteading & More! Facebook group for Food Blogging Tips, Homesteading and Homemaking content and encouragement!
We’re 3 very different US/UK military families who met and became instant forever friends.
We created the group to share real life around recipes, food blogging, homemaking, military life, homesteading and more. Head on over, say Hi, share your recipes, homemaking tips and gain some friends and knowledge along the way!
The Takeaway
This homemade dairy-free pumpkin bread is one of those simple fall recipes that makes the whole house smell wonderful. With real pumpkin purée, warm spices, and a lovely moist texture, it’s a delicious treat that doesn’t require milk, butter, or expensive specialty ingredients.
I especially love that everything can be picked up during our regular commissary shopping trip. It’s affordable, easy to prepare, and something all three of my boys can enjoy together.
Whether you’re baking for a cozy weekend breakfast, preparing snacks for the week, or stocking your freezer with homemade treats, I hope your family enjoys this pumpkin bread as much as mine does!
What To Make Next?!
Share & Rate This Recipe!
If you tried this recipe, please share your feedback with a quick star rating or comment below. And if you loved it, don’t forget to share it with friends and family too!
Published in collaboration with Far From The Farm – part of the Side Hustles Homemakers Team!




2 Comments