
The Best Homemade Stand Mixer Flour Tortillas (Easy 4-Ingredient Recipe)
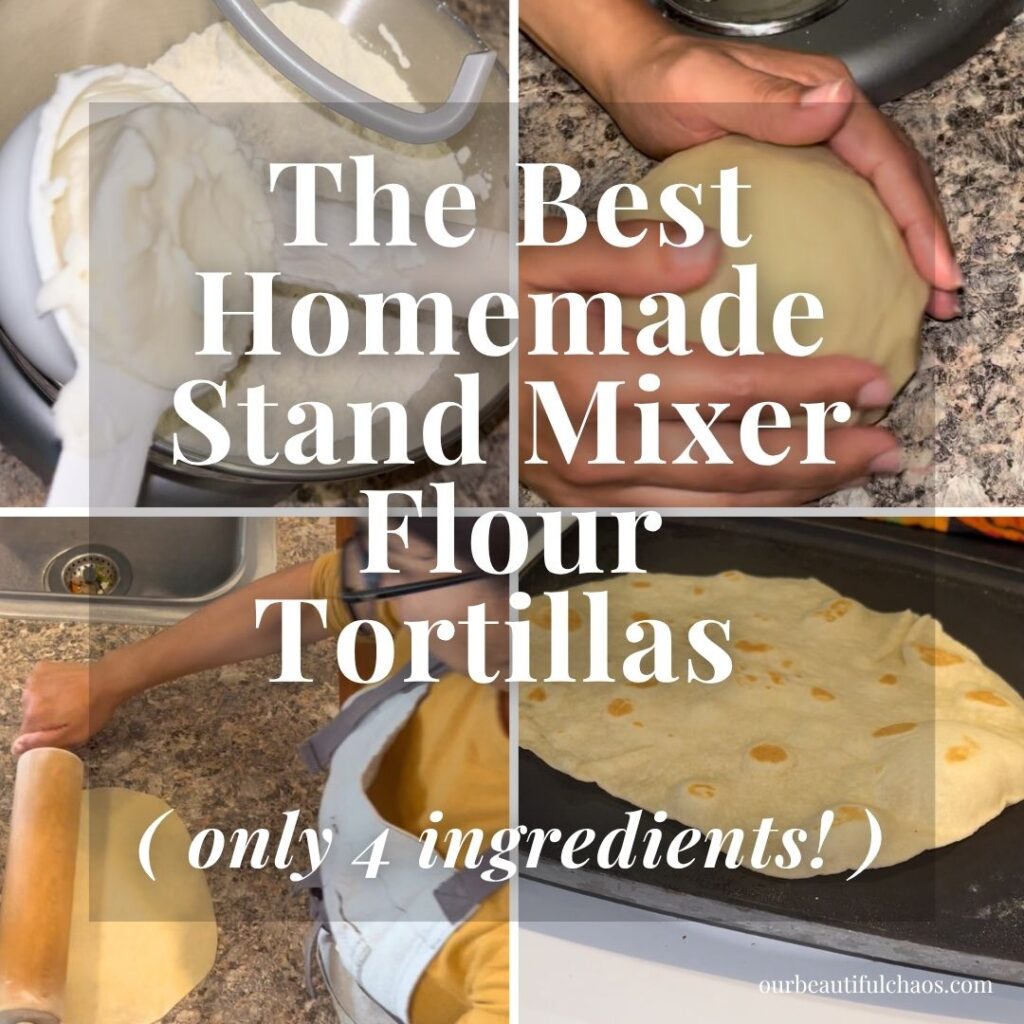
Easy Homemade Tortillas: A Dairy-Free & Vegan Recipe From Scratch Using Your KitchenAid!
‘Soft, flexible homemade flour tortillas made with just four simple ingredients and a stand mixer. No tortilla press required, no complicated techniques, and no dairy. Just fresh tortillas that are perfect for tacos, burritos, quesadillas, and all your favorite family meals.‘ – Julie, Our Beautiful Chaos.
Hi! I’m Julie, a military spouse, mom of three, and the blogger behind Our Beautiful Chaos.
If you’ve been here a while, you’ll know that most of what I share comes from real life in our home. Busy days, military family life, feeding my boys safely, and finding ways to still put good, comforting food on the table without spending my whole day in the kitchen.
In our family, dairy-free living isn’t a choice or a trend. It’s something we navigate every single day because one of my boys has a life-threatening dairy allergy. That means everything I make has to be safe, but it also has to feel normal, filling, and something everyone actually enjoys eating!
That’s why I care so much about recipes like this one. They make it possible for all of us to enjoy the same food together, without worry.
Coming from a Mexican-American family, homemade tortillas have always been part of the food I’ve grown up around. But here’s something you might not expect: it’s only recently that I’ve really started practicing making them myself, and becoming confident enough to make them regularly without needing a tortilla press!
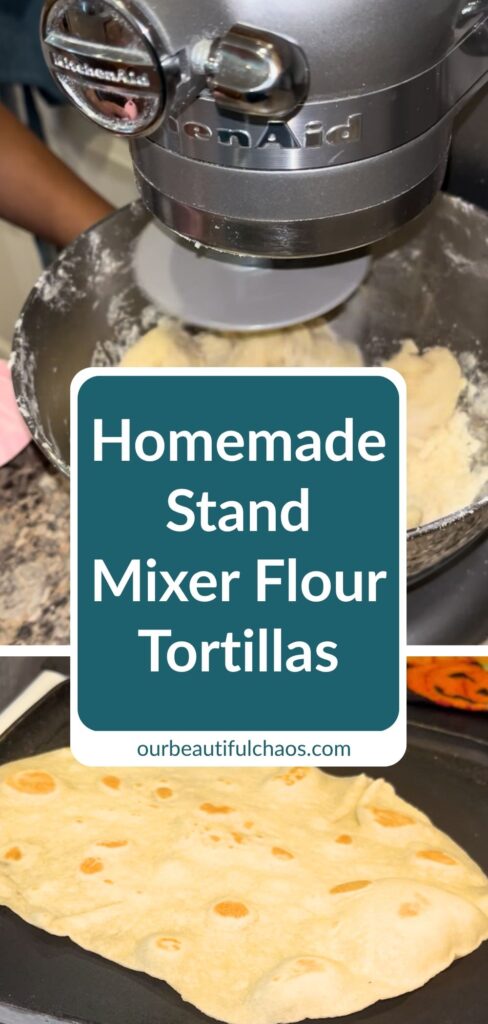
There’s definitely a learning curve when it comes to getting the dough just right, rolling it thin enough, and knowing when it’s ready to flip. But once you get the hang of it, making homemade flour tortillas becomes so much easier.
For me, one of the biggest things that helped was finding a reliable recipe I could make the same way each time. These homemade stand mixer flour tortillas use just four ingredients: all-purpose flour, vegetable shortening, salt, and hot water.
Nothing complicated or expensive, and no milk, butter, or eggs. They’re soft, flexible, and perfect for everything from taco nights to homemade burritos. Best of all, they’re naturally dairy-free and vegan when you use suitable ingredients, which makes them a wonderful option for our allergy-friendly home.
Now, could you make these entirely by hand? Absolutely! But between raising three active boys, military family life, being in school, working, and running this blog, I’m always looking for little ways to make homemade cooking more manageable.
My KitchenAid does most of the mixing for me, and then I finish the dough with a quick knead by hand. It saves me time and effort without sacrificing that lovely homemade texture.
And you really don’t need a tortilla press either. I roll mine out with an ordinary rolling pin, turning the dough a little as I go to get that familiar round tortilla shape. I’ll be the first to admit that getting them perfectly circular takes practice, but honestly, who cares if your homemade tortillas aren’t perfectly round?
As long as they’re thin enough to cook properly and soft enough to wrap around your favorite fillings, you’ve done a great job! I’ve included my video below so you can see exactly how I roll mine.
I also love how much money you can save by learning to make everyday basics at home. Flour, shortening, salt, and water are inexpensive ingredients, and this recipe makes around 10 to 14 tortillas, depending on how large you roll them.
If you’re looking for practical dairy free recipes for military families, especially ones that use ordinary ingredients you can pick up at the commissary, learning to make your own tortillas is a great place to start. They’re useful for so many meals, and knowing exactly what goes into them gives me extra peace of mind when feeding my boys.
Now let’s head into the kitchen and make these together!
Our Beautiful Chaos – Recipe Disclaimer
All recipes are shared as a guide based on what works in my home kitchen. Results may vary.
It is your responsibility to check all ingredients for allergies, intolerances, or dietary needs before cooking. Our Beautiful Chaos is not responsible for any reactions or outcomes from the use of these recipes.
Nutritional information is an estimate only.
– Julie from Our Beautiful Chaos
Sneak Peak!
Here is a quick glimpse of the recipe!
Equipment
You don’t need a tortilla press or any specialist bread-making equipment for this recipe. Here’s what I use to make my homemade flour tortillas.
Available on Amazon.com [ad]
- Stand mixer with dough hook attachment: I use my KitchenAid to bring the tortilla dough together. It makes the process much easier, especially when I’m making tortillas alongside the rest of dinner.
- Measuring cups and spoons: For measuring the flour, shortening, salt, and water.
- Kettle: To boil the water needed for the dough.
- Heatproof measuring jug: For dissolving the salt in the boiling water before adding it to the flour.
- Silicone spatula: For scraping down the sides of the mixing bowl.
- Rolling pin: For rolling the dough into thin tortillas without a press.
- Flat frying pan, skillet, or comal: For cooking the tortillas. You don’t need to add any oil or butter to the pan.
- Spatula: For safely flipping the tortillas while they cook.
- Large plate: For stacking the cooked tortillas.
- Clean kitchen towel: To cover the tortillas as they come off the pan, helping them stay warm, soft, and flexible.
Optional equipment: A bench scraper or kitchen scale can make dividing the dough into even portions easier, but I usually just do this by hand.
Ingredients
Makes approximately 10 to 14 homemade flour tortillas, depending on size.
You only need four simple pantry ingredients to make these soft, homemade flour tortillas. There’s no yeast, baking powder, milk, or butter, making this an affordable dairy-free and vegan recipe when using suitable ingredients.
- 3 cups all-purpose flour
- 1/2 cup vegetable shortening, such as Crisco
- 1 1/2 teaspoons salt
- 1 cup boiling water
That’s it! Four everyday ingredients, and you’re ready to make homemade flour tortillas from scratch.
Let’s Take a Closer Look at the Ingredients for Vegan Tortillas!
All-Purpose Flour (3 cups)
Regular all-purpose flour works beautifully for homemade tortillas. It provides enough structure to hold everything together while still allowing you to roll the dough nice and thin.
You don’t need bread flour or any specialist tortilla flour.
For the most consistent results, spoon the flour into your measuring cup and level it off rather than scooping directly from the bag. Too much flour can make your tortillas dry, stiff, and difficult to roll.
Vegetable Shortening (1/2 cup)
I use vegetable shortening, such as Crisco, because it helps create soft, tender tortillas that stay flexible after cooking.
Rubbing the shortening into the flour before adding the water distributes the fat throughout the mixture, giving the dough a fine, sandy texture.
Vegetable shortening is also a useful alternative to traditional lard or butter when you’re making vegan or dairy-free tortillas.
Allergy-friendly tip: Always check the shortening packaging to make sure it’s suitable for your family’s dietary needs, particularly if you’re managing a severe dairy allergy.
Salt (1 1/2 teaspoons)
Salt might seem like a small ingredient, but it makes a big difference to the finished flavor.
I dissolve mine in the boiling water before adding it to the flour mixture. This helps distribute the seasoning evenly throughout the dough.
Boiling Water (1 cup)
The very hot water helps hydrate the flour and brings the dough together into a soft, pliable consistency.
I boil mine in the kettle, then carefully pour it into a heatproof measuring jug containing the salt.
After allowing approximately 20 seconds for the salt to dissolve, I add the water to my stand mixer in two stages.
Kitchen safety tip: The water will be extremely hot, so pour carefully and make sure your equipment is suitable for hot liquids.
How to Make Homemade Flour Tortillas Using a Stand Mixer
Making homemade flour tortillas is much easier once you understand how the dough should look and feel at each stage. My KitchenAid takes care of most of the mixing, and then I finish the dough with a quick knead by hand before rolling and cooking.
You don’t need a tortilla press, and you certainly don’t need to worry about making perfectly round tortillas on your first attempt!
The important things are incorporating the shortening properly, allowing the dough to rest, rolling it thin enough, and cooking each tortilla on a hot, dry pan.
Step 1: Rub the Shortening Into the Flour
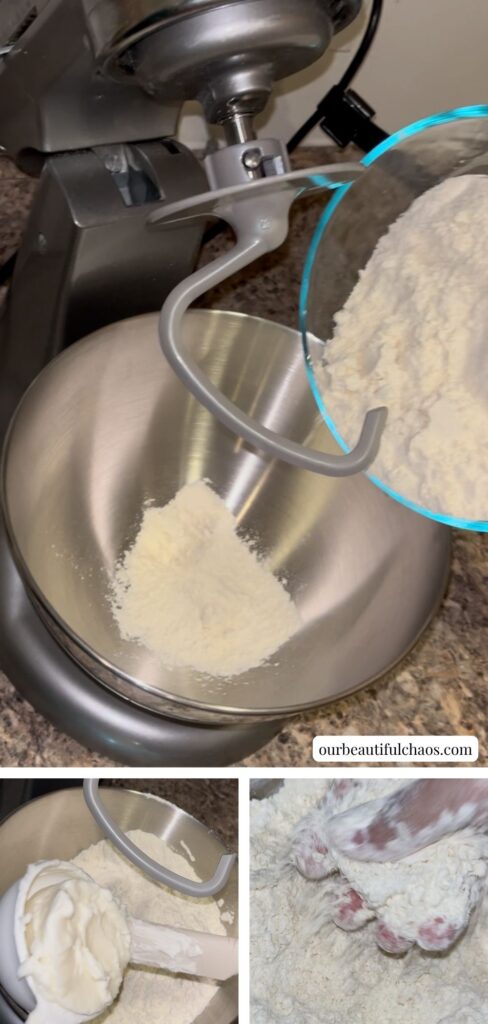
Add 3 cups of all-purpose flour and 1/2 cup of vegetable shortening to the bowl of your stand mixer.
Before attaching the dough hook, use your fingertips to gently rub the shortening into the flour.
Pick up small amounts of the mixture and rub them between your fingers until the shortening is distributed throughout the flour.
You’re looking for a texture similar to fine breadcrumbs or slightly damp sand, with no large lumps of shortening remaining.
This step helps distribute the fat evenly throughout the flour, which contributes to the soft, tender texture of the finished tortillas.
Don’t worry about making the mixture perfectly uniform. A few tiny pieces of shortening are fine, but you shouldn’t have any large chunks remaining.
Step 2: Dissolve the Salt in Boiling Water
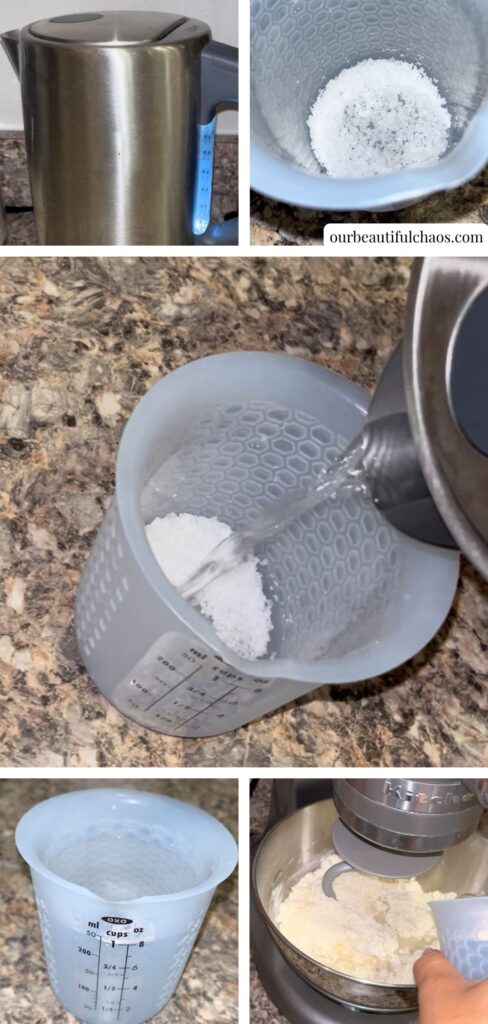
Add 1 1/2 teaspoons of salt to a heatproof measuring jug.
Boil some water in your kettle, then carefully measure 1 cup of boiling water and pour it over the salt.
Allow the mixture to sit for approximately 20 seconds, giving the salt time to dissolve.
Give it a quick stir if necessary.
I find this easier than adding the salt directly to the flour because it helps distribute the seasoning evenly throughout the dough.
Important: Take care when handling boiling water. Use a heatproof jug and keep your hands away from the steam.
Step 3: Add the First Half of the Water
Carefully pour 1/2 cup of the hot salted water into the flour and shortening mixture.
Turn your KitchenAid to its lowest mixing speed (Stir) and allow it to mix for approximately 2 minutes, using the dough hook attachment.
At this stage, the mixture may look quite crumbly, with some flour still sitting around the sides of the bowl.
That’s completely normal because you haven’t added all the water yet.
If necessary, stop the mixer and scrape down the sides of the bowl using a silicone spatula.
Never put your spatula or hands into the bowl while the mixer is running.
Step 4: Add the Remaining Water and Bring the Dough Together
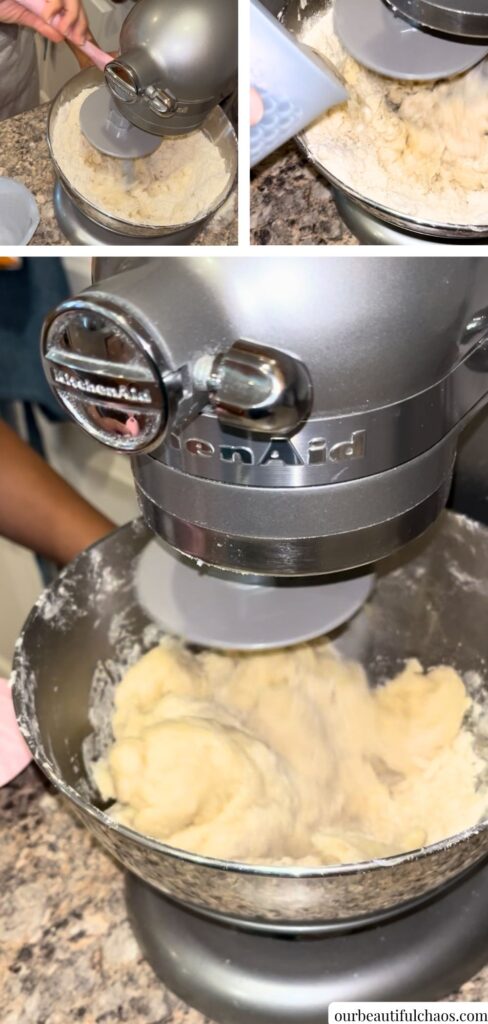
After the first 2 minutes, carefully pour in the remaining 1/2 cup of hot salted water.
Increase your KitchenAid to Speed 2 and continue mixing for approximately 2 more minutes, or until the ingredients come together into a cohesive dough.
You should begin to see the mixture gathering around the dough hook rather than remaining as separate crumbs.
The dough may not look completely smooth at this stage, and that’s fine. We’re going to finish kneading it by hand.
What should homemade tortilla dough look like at this stage?
You want the ingredients to have come together into a soft dough that holds its shape.
It shouldn’t be dry and crumbly, but it also shouldn’t resemble a wet batter or stick excessively to your hands.
If you notice a little flour remaining at the bottom of the bowl, stop the mixer and check whether the dough needs another few seconds of mixing before adding anything else.
Different flour brands absorb water differently, so the dough may feel slightly different from batch to batch.
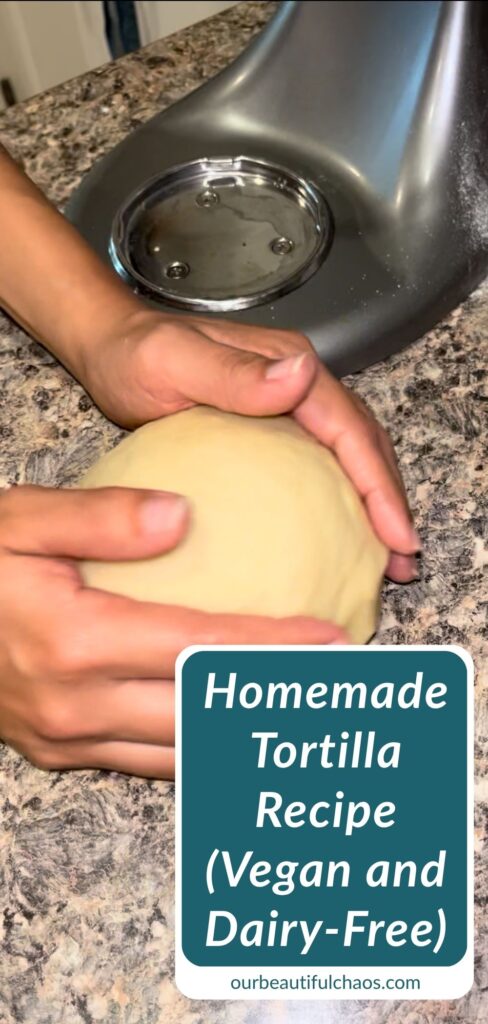
Step 5: Knead the Tortilla Dough by Hand
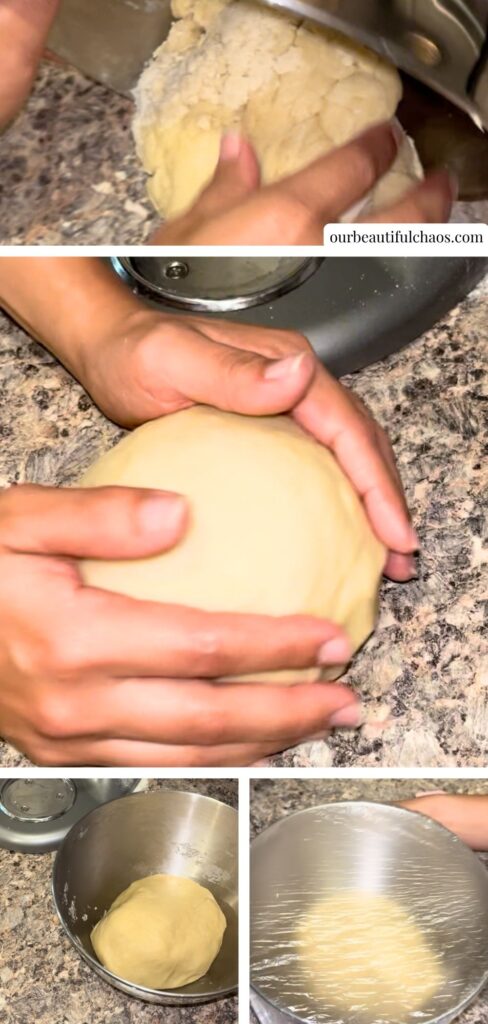
Turn off and unplug your stand mixer, then remove the dough from the mixing bowl.
Transfer it onto a clean work surface.
Using the heels of your hands, gently push the dough away from you, fold it back over itself, turn it slightly, and repeat.
Continue kneading for approximately 2 to 3 minutes, until the dough becomes smooth and pliable.
You shouldn’t need to add lots of extra flour to your work surface.
In fact, adding too much flour during kneading can make the finished tortillas dry.
The dough should feel soft and flexible, and you should be able to form it into a smooth ball without it falling apart.
If it sticks slightly when you first remove it from the bowl, continue kneading for a little while before deciding whether it needs any additional flour.
Step 6: Allow the Dough to Rest for 5 Minutes
Shape the kneaded dough into a ball and place it back into your mixing bowl.
Cover the bowl with a clean kitchen towel and allow the dough to rest for 5 minutes.
This short rest allows the flour to finish absorbing moisture and gives the gluten a chance to relax, making the dough easier to roll.
You don’t need to wait for the dough to rise because this recipe doesn’t contain yeast.
It won’t double in size like bread dough.
While the dough rests, place your flat frying pan, skillet, or comal over medium heat so it has time to warm up.
You don’t need to add any oil, butter, or cooking spray.
These tortillas cook directly on the dry surface of the pan.
Step 7: Divide the Dough Into 10 to 14 Portions
After the dough has rested, remove it from the bowl and place it onto your clean work surface.
Divide it into approximately 10 to 14 pieces, depending on how large you want your tortillas.
I usually divide mine by hand because I’ve made them often enough that I’m comfortable judging the portions by eye.
But if you’re new to making tortillas, you can use a bench scraper or kitchen scale to make the pieces more consistent.
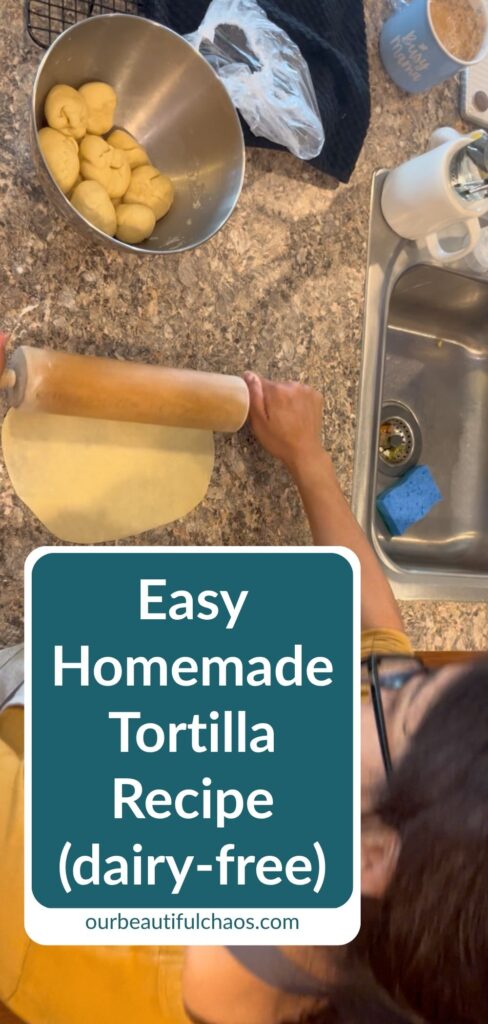
Roll each portion gently between your hands to form a small, smooth ball.
Try to keep the dough balls roughly the same size so your tortillas cook evenly and you end up with a consistent batch.
A little tip: Keep the dough balls you’re not currently working with covered by a clean kitchen towel. This helps prevent their surfaces from drying out while you’re rolling the others.
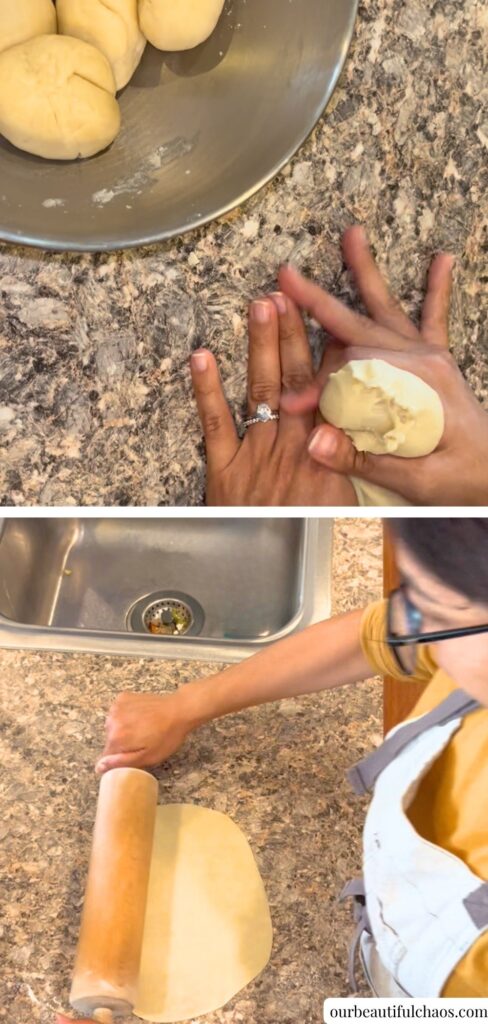
Step 8: Roll Out the Tortillas Without a Tortilla Press
This is the part that took me the most practice when I started making homemade tortillas!
But once you get comfortable with your rolling pin, it really does become much easier.
Take one ball of dough and place it onto your clean work surface.
Flatten it slightly with the palm of your hand to create a small disc.
Using your rolling pin, roll gently from the center of the dough outward.
Then lift or turn the dough approximately a quarter turn and roll again.
Keep repeating this process:
- Roll from the center outward.
- Turn the dough slightly.
- Roll again.
- Continue until the tortilla is thin and approximately circular.
Turning the dough as you roll helps prevent it from stretching into a long oval.
You don’t need to apply lots of pressure. Several gentle passes with your rolling pin are usually easier to control than trying to flatten the dough all at once.
How thin should homemade flour tortillas be?
You want to roll the dough as thinly as you can while still being able to lift it without tearing.
A good visual guide is that you should be able to faintly see the color or outline of your work surface through the dough.
The tortilla should still hold together when you pick it up.
If it’s so thin that it tears immediately, you’ve gone a little too far.
If it’s thick and heavy, it may cook more like a flatbread than the soft, flexible tortilla you’re aiming for.
Don’t worry if your first few tortillas aren’t perfectly round or if it takes a couple of attempts to find the right thickness.
That’s completely normal when you’re learning!
I really recommend watching my video if you’re making homemade flour tortillas for the first time. It’s much easier to understand the thickness and rolling technique when you can actually see what I’m doing.
Step 9: Cook the Tortillas on a Hot, Dry Pan
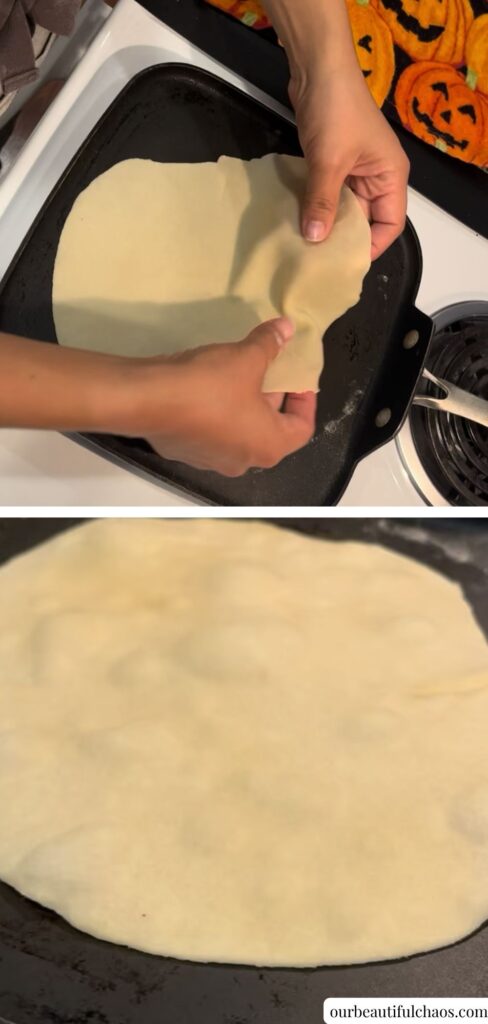
Once your pan or comal has heated over medium heat, carefully lift your first rolled tortilla and lay it flat on the cooking surface.
You don’t need any oil or butter.
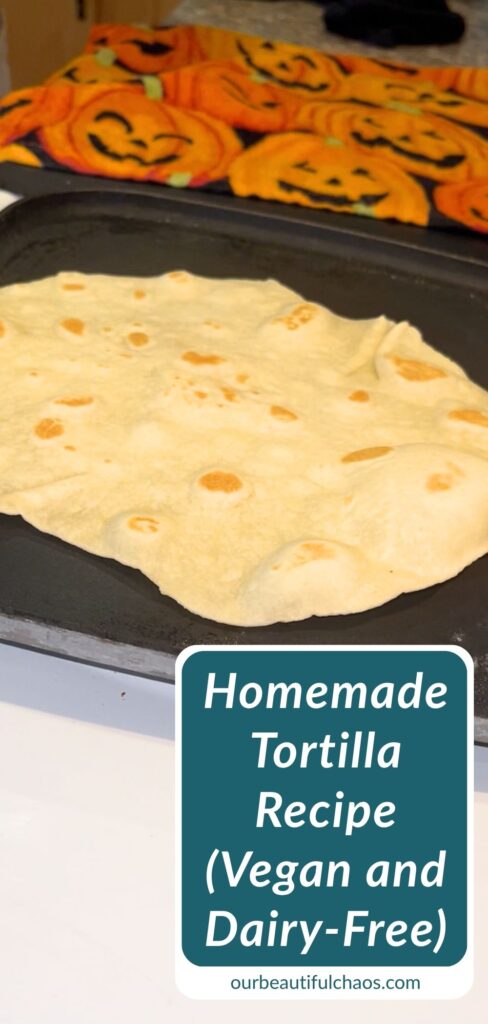
Allow the tortilla to cook for approximately 30 to 45 seconds on the first side.
As it cooks, you should begin to notice small bubbles appearing on the surface.
The dough will also start changing from slightly translucent to more opaque as it cooks.
Wait until you see bubbles forming before flipping the tortilla.
Once the first side has developed bubbles, carefully flip it over using a spatula.
Cook the second side for approximately 30 seconds, or until the tortilla is cooked through and has developed a few light golden-brown spots.
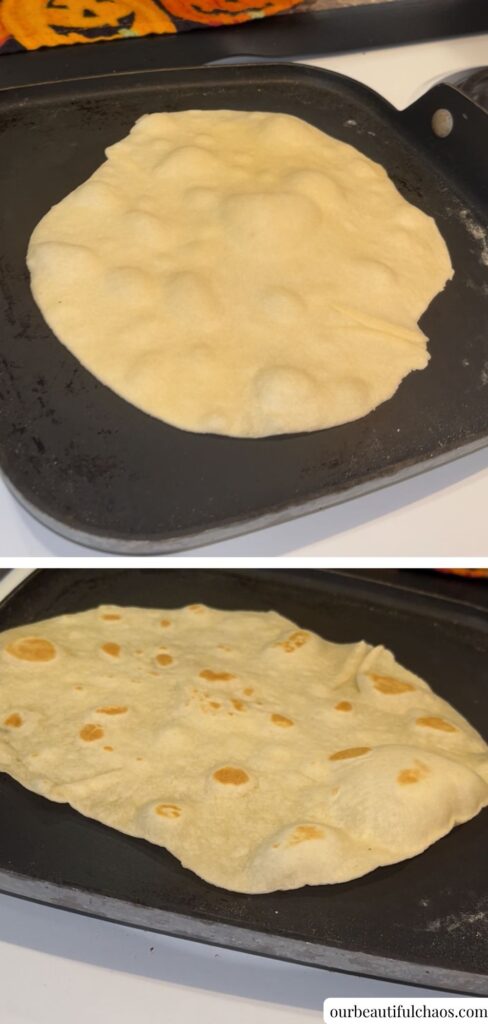
You may notice some additional puffing as the second side cooks.
That’s a good sign!
The exact cooking time will depend on the thickness of your tortillas and how hot your pan is.
If the tortilla becomes dark brown almost immediately, your pan may be too hot.
If it takes much longer than expected to develop bubbles or brown spots, your pan may need a little more time to heat up.
Kitchen safety note: You might see people flipping tortillas with their bare hands, but please don’t feel you need to do that. I recommend using a spatula or tongs to protect your fingers from the hot pan.
Step 10: Keep the Cooked Tortillas Warm and Soft
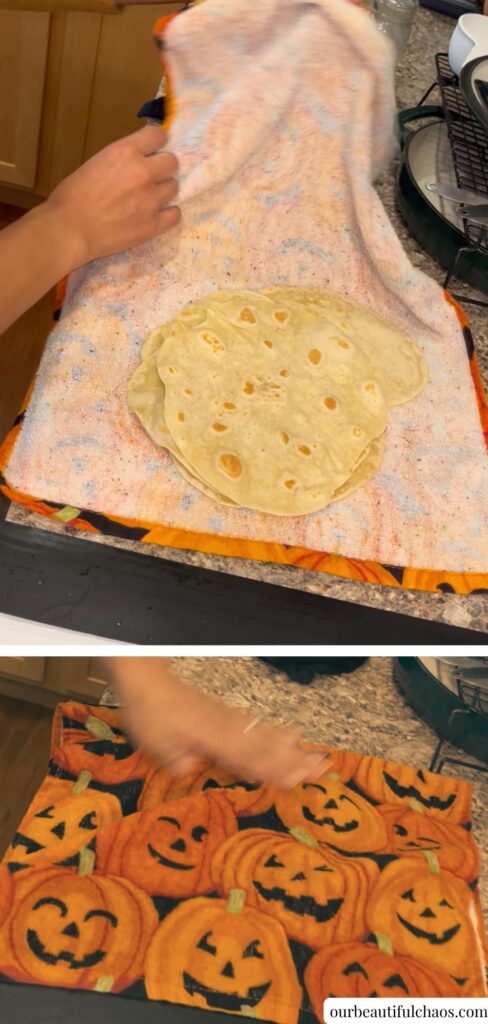
As soon as your tortilla has finished cooking, remove it from the pan and place it onto a clean plate.
Immediately cover it with a clean kitchen towel.
This is one of my favorite little tricks for keeping homemade flour tortillas soft.
As the freshly cooked tortillas sit beneath the towel, some of their warmth and moisture is retained.
That gentle steam helps keep the tortillas flexible rather than allowing them to dry out as they cool.
Continue rolling and cooking the remaining dough balls, adding each finished tortilla to the stack beneath the towel.
The tortillas will stay warm while you finish the batch, and the texture will become lovely and soft.
Don’t skip this step! Leaving freshly cooked tortillas uncovered on the counter can allow them to dry out and become stiff.
Step 11: Serve Your Homemade Flour Tortillas
Once all your tortillas are cooked, they’re ready to enjoy!
You can serve them straight away while they’re still warm, or allow them to cool before storing them for later.
These homemade flour tortillas are wonderful for:
- Tacos
- Burritos
- Quesadillas
- Breakfast wraps
- Fajitas
- Lunch wraps
- Homemade tortilla pizzas
- Sweet tortilla desserts
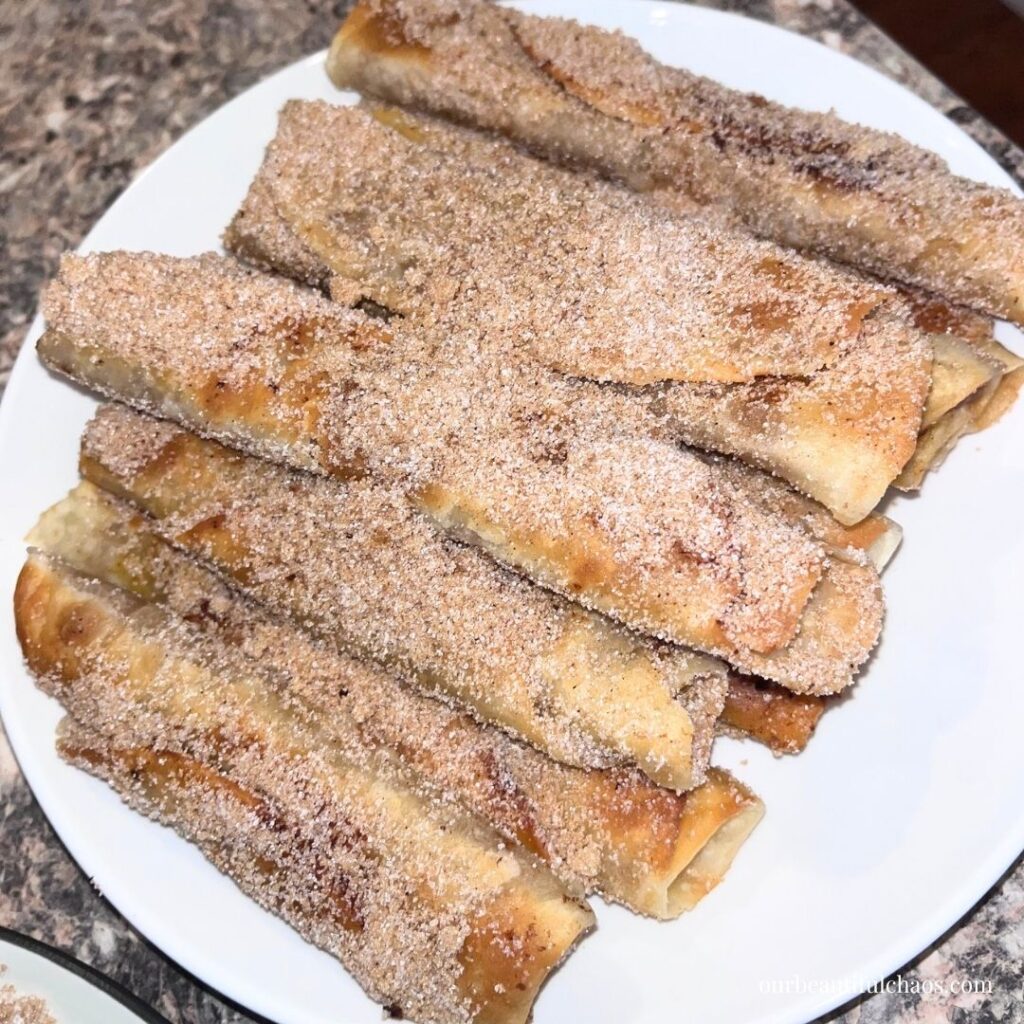
They’re also perfect for my Easy Pumpkin Buñuelos Roll Ups (Vegan & Dairy-Free), where I fill them with sweet pumpkin cream cheese, fry them until golden, and coat them in pumpkin spice sugar.
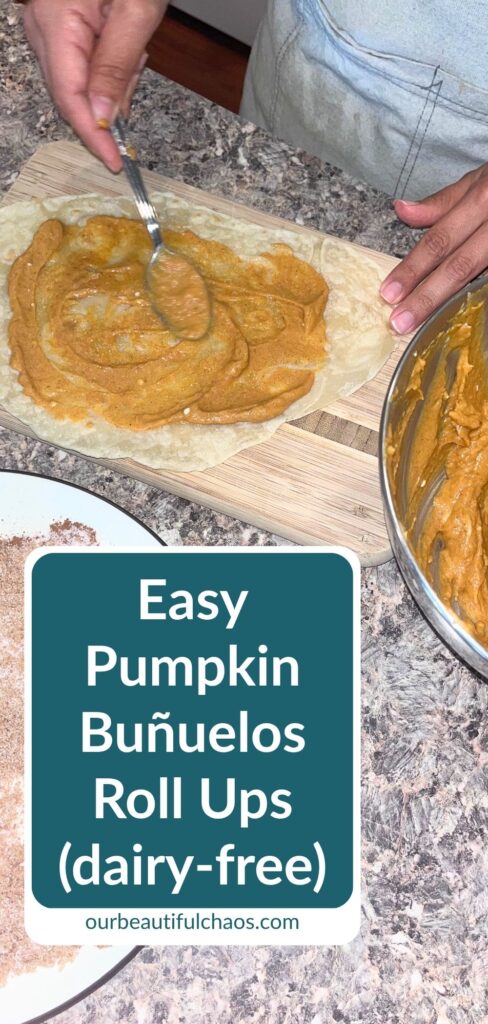
And remember, homemade tortillas don’t need to look exactly like the ones you buy at the grocery store.
A few slightly uneven edges or wonky circles are part of learning to make them yourself.
What matters is that you’ve made fresh, soft tortillas from just four simple ingredients, and you’ve learned a useful kitchen skill you can keep coming back to.
How to Make These Homemade Flour Tortillas Without a Stand Mixer
Although I use my KitchenAid because it saves me time, you can make this recipe entirely by hand if you don’t have a stand mixer.
Start by rubbing the vegetable shortening into the flour using your fingertips, just as you would in the original recipe.
Dissolve the salt in the boiling water, then carefully add the hot water to the flour mixture in stages, stirring with a sturdy spoon until the dough begins to come together. Avoid handling the mixture directly while the water is still hot.
Once it’s cool enough to handle safely, transfer the dough to a clean work surface and knead until smooth and pliable. Because you’re mixing everything by hand, this may take a little longer than the stand mixer method.
Cover the dough and allow it to rest for 5 minutes before dividing, rolling, and cooking as directed.
The ingredients and cooking method stay the same. The only difference is that you’re doing the mixing and kneading yourself.
Notes
If you’re new to making homemade flour tortillas, don’t be discouraged if your first few attempts aren’t quite what you expected!
Even though I grew up in a Mexican-American family where homemade tortillas were part of our family cooking, it’s only recently that I’ve become confident making them myself regularly.
And one thing I’ve learned is that making good tortillas isn’t just about following a recipe. It’s also about getting familiar with how the dough should feel, how thin to roll it, and how quickly it cooks.
The good news is that most homemade tortilla problems are easy to identify and fix once you know what to look for.
Here are some of the most common issues you might run into when making flour tortillas with your KitchenAid, along with practical ways to solve them.
Tortilla Troubleshooting: How to Make Soft Homemade Flour Tortillas Every Time
If your tortilla dough looks like dry breadcrumbs and won’t come together into a smooth ball, it may not have enough moisture.
This can happen if you’ve accidentally measured too much flour, particularly if you’ve scooped it directly from the bag and packed it into your measuring cup.
Different brands of all-purpose flour can also absorb slightly different amounts of water.
How to fix it:
First, make sure you’ve added the full cup of hot water specified in the recipe.
Remember that we add the water in two stages, so the mixture will look crumbly after the first addition.
If you’ve added all the water and mixed for the full time but the dough is still falling apart, try kneading it briefly by hand to see whether the remaining flour incorporates.
If it’s genuinely too dry to hold together, add a small amount of warm water, approximately 1 teaspoon at a time, and knead until the dough becomes cohesive.
Avoid adding several tablespoons of water at once because it’s surprisingly easy to go from dry dough to overly sticky dough.
You’re looking for a soft, pliable consistency that holds together without crumbling.
If your tortilla dough sticks excessively to your fingers, rolling pin, or countertop, it may contain too much moisture relative to the flour.
This can happen if the flour was measured too lightly or if the dough hasn’t been mixed and kneaded sufficiently.
How to fix it:
Before adding more flour, finish the recommended kneading time.
Sometimes dough that initially feels sticky becomes easier to handle as the flour finishes absorbing the water and the ingredients come together.
If it’s still extremely sticky after kneading, lightly dust your work surface with flour and work a small amount into the dough.
Only add enough to make the dough manageable.
Too much additional flour can make your finished tortillas dry and stiff, so it’s better to make small adjustments.
Have you ever rolled out a tortilla, only to watch it shrink back into a smaller, thicker circle?
This happens because flour tortilla dough contains gluten, which gives it elasticity.
That elasticity is useful because it helps the tortilla hold together, but it can also make freshly kneaded dough resist stretching.
How to fix it:
Make sure you allow the dough to rest for the full 5 minutes after kneading.
If an individual dough ball still keeps shrinking back while you’re rolling it, cover it and let it rest for another 5 to 10 minutes before trying again.
You can also move on to another dough ball while the first one relaxes.
Avoid repeatedly forcing the rolling pin over dough that’s resisting you. A little extra resting time usually makes rolling much easier.
If your tortillas tear when you try to transfer them to the pan, you may have rolled them too thin or stretched the dough unevenly.
Very sticky dough can also make tortillas difficult to lift from the countertop.
How to fix it:
Try rolling the next tortilla slightly thicker, particularly around the edges.
Make sure you’re rolling evenly rather than concentrating all the pressure in one area.
If the dough is sticking to your work surface, use a very light dusting of flour.
You can also gently loosen the tortilla from the counter before attempting to lift the entire piece.
If it tears repeatedly, check whether the dough is too wet or whether it needs a little more resting time.
The goal is to roll it thin enough to cook properly while still maintaining enough strength to transfer it into the pan.
This is one of the most frustrating problems when making homemade tortillas.
You want soft, flexible tortillas that can wrap around taco fillings or fold into burritos, not something that cracks when you bend it.
Hard tortillas are often caused by overcooking, excessive flour, or allowing them to dry out after cooking.
Because these tortillas are rolled very thinly, they cook quickly.
Leaving them in the pan for too long can drive out too much moisture.
How to fix it:
Follow the approximate cooking times in the recipe:
- First side: 30 to 45 seconds, until bubbles appear.
- Second side: Approximately 30 seconds, until cooked through.
Adjust the timing according to the thickness of your tortillas and the temperature of your pan.
Remove them once they’re cooked rather than continuing to brown them unnecessarily.
Most importantly, transfer each finished tortilla directly to a plate and cover it with a clean kitchen towel.
The towel helps retain warmth and moisture while you cook the rest of the batch.
If your tortillas are already stiff, gently reheating them with a little moisture may help soften them, although severely overcooked tortillas won’t completely recover their original texture.
When flour tortillas cook on a hot pan, small bubbles often form as moisture inside the dough turns to steam.
You may also notice larger pockets of air forming as the tortilla cooks.
However, your tortillas don’t need to puff into one large balloon to be successful.
Some will develop lots of bubbles, while others may only puff slightly.
If you’re not seeing any bubbles at all, the pan may not be hot enough, or the dough may be too thick.
How to fix it:
Allow your skillet or comal to preheat properly over medium heat before adding the first tortilla.
Roll the dough evenly and thinly.
Watch the first side carefully for small bubbles and a change in the appearance of the dough before flipping.
If the tortilla sits in the pan for a long time without changing, the cooking surface may need to be hotter.
Increase the heat slightly and test the next tortilla.
Remember that puffing is only one visual clue. The important thing is that the tortilla cooks through without becoming excessively dry or burnt.
Storage: How to Keep Homemade Flour Tortillas Fresh
One of the benefits of making homemade tortillas is that you can prepare a batch and have them ready for several meals.
Because these tortillas don’t contain commercial preservatives, it’s important to store them properly to help maintain their freshness.
How to Store Homemade Flour Tortillas at Room Temperature
If you’re planning to eat your tortillas shortly after making them, keep them covered with a clean kitchen towel while they cool.
Once they’re completely cool, transfer them to a clean, airtight container or food-safe storage bag.
For longer storage, I recommend refrigerating or freezing them rather than leaving homemade tortillas at room temperature.
Avoid sealing the tortillas while they’re still hot, as trapped condensation can make them wet and encourage spoilage.
How Long Do Homemade Flour Tortillas Last in the Refrigerator?
Homemade flour tortillas can generally be stored in an airtight container or sealed food-safe bag in the refrigerator for approximately 3 to 4 days.
Allow them to cool completely before packing them away.
If you’re stacking several tortillas together, you can place pieces of parchment paper between them to make separating them easier, particularly if you’re planning to remove just one or two at a time.
Check the tortillas before using them and discard them if you notice mold, an unusual smell, or other signs of spoilage.
Because homemade tortillas don’t contain preservatives, I prefer not to leave them sitting in the refrigerator for extended periods.
Can You Freeze Homemade Flour Tortillas?
Yes! Homemade flour tortillas are a great option for freezer meal preparation.
Allow the cooked tortillas to cool completely before freezing.
Stack them with pieces of parchment paper between individual tortillas if you want to be able to remove them separately.
Place the stack into a freezer-safe bag or airtight container, removing as much excess air as possible.
Label the bag with the date and freeze.
For the best quality, aim to use your frozen tortillas within approximately 2 to 3 months.
Freezing may slightly change their texture, but reheating them gently can help restore flexibility.
Note: These are general storage recommendations rather than a claim that every storage method has been personally tested with this particular batch.
How to Reheat Homemade Flour Tortillas
The key to reheating homemade tortillas is to warm them gently without cooking away too much additional moisture.
On the stovetop:
- Heat a dry skillet over medium-low heat.
- Place one tortilla into the pan and warm briefly on each side until soft and flexible.
- Remove it as soon as it’s warmed through.
In the microwave:
- Place one or more tortillas on a microwave-safe plate.
- Cover them with a slightly damp paper towel and heat in short intervals until warm.
- The damp towel helps prevent the tortillas from drying out.
From frozen:
- Allow the tortillas to thaw in the refrigerator, then warm them using either method above.
- You can also try reheating individual frozen tortillas directly in a skillet over gentle heat, turning them as needed.
- Avoid leaving tortillas in a hot pan for too long, as they can become stiff and brittle.
Make-Ahead Tips for Homemade Flour Tortillas
If you’re trying to make family mealtimes easier, preparing tortillas ahead of time can be a useful way to save a little work later…
The recipe is designed around a short 5-minute dough rest, followed by rolling and cooking.
If you want to prepare the dough further in advance, you can try refrigerating it in a covered container.
However, a longer rest in the refrigerator may change how the dough handles, particularly because the vegetable shortening will firm up when chilled.
Allow refrigerated dough to warm slightly until it’s pliable enough to roll.
You may also find that it needs a little extra resting time if it springs back.
I recommend following the original short-rest method for your first batch, then experimenting with longer make-ahead times once you’re familiar with the dough.
You can prepare your dough portions ahead of time, but I recommend rolling each tortilla shortly before cooking it.
Thinly rolled dough can dry out or stick to other tortillas if left sitting for too long.
If you’re cooking a large batch, keep the unrolled dough balls covered and work through them one at a time.
That way, each tortilla goes into the pan while the dough is still soft and easy to handle.
Yes, cooking tortillas ahead of time can make serving a group much easier.
Prepare the tortillas, allow them to cool, and store them appropriately until you’re ready to serve.
Reheat them gently in batches, then keep them covered until serving.
If you’re making tacos or fajitas for a family gathering, a covered stack of warm tortillas is much easier to manage than trying to roll and cook them while everyone is waiting to eat.
Serving Ideas: What to Make With Homemade Flour Tortillas
One of my favorite things about learning to make homemade tortillas is how many different meals you can use them for. They’re such a useful basic recipe to have in your collection, especially when you’re trying to make affordable meals from ingredients you already have at home.
And because this recipe is dairy-free and vegan when made with suitable ingredients, it’s easy to pair these tortillas with fillings that work for your family’s dietary needs…
Homemade Tacos
- Use smaller tortillas for taco night and fill them with your favorite seasoned meat, beans, vegetables, or other taco fillings.
- They’re especially good served warm straight from the pan.
Breakfast Burritos
- Fill larger tortillas with scrambled eggs, breakfast potatoes, sausage, or your favorite dairy-free breakfast ingredients.
- They’re also useful for preparing breakfast burritos ahead of time.
Dairy-Free Quesadillas
- Add your favorite dairy-free cheese alternative and other fillings, then cook the filled tortilla in a skillet until heated through.
- You can also make quesadillas without cheese using seasoned beans, vegetables, or shredded meat.
Homemade Burritos
- Roll larger tortillas around rice, beans, meat, vegetables, or whatever fillings your family enjoys.
- If you’re planning to make burritos, divide your dough into fewer, larger portions so you have enough room for the filling.
Fajitas
- Serve warm homemade tortillas alongside seasoned chicken, beef, peppers, and onions.
- Everyone can build their own, which is always helpful when you’re feeding a family with different preferences.
Lunch Wraps
- Use cooled tortillas for simple lunch wraps filled with your favorite allergy-safe ingredients.
- They’re a useful alternative to sandwich bread when you want something different.
Homemade Tortilla Pizzas
- Spread a little pizza sauce over a cooked tortilla, add your favorite toppings, and bake until everything is heated through.
- Just remember to use dairy-free cheese or other suitable toppings if you’re cooking for someone with a milk allergy.
Sweet Tortilla Desserts
- Homemade flour tortillas aren’t just for savory meals! You can also use them as the base for simple desserts.
- One of my favorite ways to use these tortillas is in my Easy Pumpkin Buñuelos Roll Ups (Vegan & Dairy-Free). They’re filled with a creamy pumpkin mixture, fried until golden, and coated in a sweet pumpkin spice sugar mixture.
Why You’ll Love This Homemade Flour Tortilla Recipe?!
There are so many reasons to love learning how to make flour tortillas from scratch, especially when you’re cooking for a busy family…
- Only Four Ingredients: You don’t need a long shopping list or expensive specialty ingredients. Just flour, vegetable shortening, salt, and water.
- Naturally Dairy-Free: There’s no milk or butter in the recipe, making it a useful option for families managing dairy allergies when all ingredients are suitable.
- Vegan-Friendly: Using suitable vegetable shortening makes these tortillas a great option for vegan meals.
- Made With a Stand Mixer: My KitchenAid handles most of the mixing, saving me time and effort when life gets busy.
- No Tortilla Press Required: You can roll these tortillas with an ordinary rolling pin, so there’s no need to purchase additional equipment.
- Budget-Friendly: Homemade tortillas are an affordable way to stretch everyday pantry ingredients into something the whole family can enjoy.
- Soft and Flexible: When rolled thinly, cooked correctly, and kept covered after cooking, these tortillas are ideal for wrapping around your favorite fillings.
- Versatile: Use them for tacos, burritos, quesadillas, breakfast wraps, fajitas, and even desserts.
- Freezer-Friendly: Make a batch ahead of time and freeze the extras for future meals.
- A Useful Kitchen Skill: Once you become comfortable making homemade tortillas, it’s something you can keep doing again and again.
And for me, there’s something particularly special about becoming confident making a food that’s always been part of my Mexican-American family cooking. It’s taken practice, but I’m so happy to have a recipe I can now make regularly and share with you!
FAQ’s: Frequently Asked Questions About Homemade Flour Tortillas
If you’re making homemade flour tortillas for the first time, you might have a few questions about the ingredients, equipment, and different ways to prepare them.
Here are some of the questions I think are most helpful to answer before you get started.
Absolutely! Although I use my KitchenAid because it saves me time, you can make these tortillas entirely by hand.
Rub the vegetable shortening into the flour using your fingertips until the mixture resembles fine breadcrumbs. Dissolve the salt in the boiling water, then carefully stir the hot water into the flour mixture in two additions using a sturdy spoon.
Once the dough is cool enough to handle safely, transfer it to a clean work surface and knead until smooth and pliable. This may take a little longer than the stand mixer method.
Cover the dough and allow it to rest for 5 minutes before dividing, rolling, and cooking as directed.
The ingredients stay exactly the same!
You can try using a tortilla press, but I personally prefer using a rolling pin for these homemade flour tortillas.
Flour tortilla dough contains gluten, which makes it elastic. Unlike traditional corn tortilla dough, it can spring back after being pressed, making it more difficult to achieve the thin tortillas you’re looking for.
A rolling pin gives you more control over the thickness and size, particularly if you’re making larger tortillas for burritos or wraps.
If you already own a tortilla press, you can certainly experiment with it, but you may still need to finish thinning the dough with a rolling pin.
You definitely don’t need to buy a tortilla press for this recipe!
Traditional flour tortilla recipes often use lard, while some modern recipes use butter or liquid oil.
However, this particular recipe was developed using 1/2 cup of solid vegetable shortening, which helps create its soft, flexible texture.
Substituting another fat can change the dough consistency and how the tortillas cook.
Butter also contains dairy, making it unsuitable for our family’s milk allergy, while traditional lard isn’t vegan.
If you’re making these tortillas for the first time, I recommend following the recipe as written before experimenting with substitutions.
Yes! The recipe contains no milk, butter, eggs, or other intentionally added animal-derived ingredients.
The four ingredients are all-purpose flour, vegetable shortening, salt, and water.
When made with suitable ingredients, these tortillas are both vegan and dairy-free.
However, because one of my boys has a life-threatening dairy allergy, I always recommend checking ingredient labels and relevant allergen information carefully.
Be especially mindful of the vegetable shortening you choose, and follow the cross-contact precautions appropriate for your household.
You can experiment with replacing some of the all-purpose flour with whole wheat flour, but it will change the texture of the tortillas.
Whole wheat flour generally absorbs more water and produces a heartier, less delicate tortilla.
If you’d like to experiment, consider starting by replacing 1/2 cup of the all-purpose flour with whole wheat flour, keeping the remaining flour as written.
You may need to adjust the water slightly depending on how the dough feels.
I haven’t included a fully tested whole wheat variation here, so I recommend making the original all-purpose flour recipe first to get familiar with the correct dough consistency.
The Best Homemade Stand Mixer Flour Tortillas (Easy 4-Ingredient Recipe)
Equipment
- Stand mixer with dough hook attachment
- Measuring cups and spoons
- Kettle
- Heatproof measuring jug
- Silicone spatula
- Rolling Pin
- Flat frying pan, skillet, or comal
- Spatula
- Large plate
- Clean kitchen towel
- Bench scraper or kitchen scale (optional)
Ingredients
- 3 cups all-purpose flour
- 1/2 cup vegetable shortening such as Crisco
- 1 1/2 tsp salt
- 1 cup 1 cup boiling water
Instructions
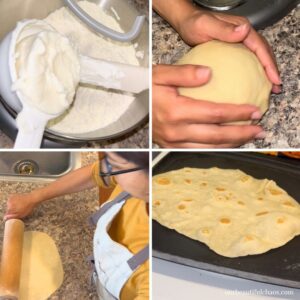
Combine the flour and shortening.
- Add 3 cups of all-purpose flour and 1/2 cup of vegetable shortening to the bowl of your stand mixer. Using your fingertips, gently rub the shortening into the flour until the mixture resembles fine breadcrumbs or slightly damp sand.
Dissolve the salt.
- Place 1 1/2 teaspoons of salt into a heatproof measuring jug. Carefully pour in 1 cup of boiling water and allow it to sit for approximately 20 seconds, stirring if necessary, until the salt dissolves.
Add the first half of the water.
- Attach the dough hook to your stand mixer. Carefully pour 1/2 cup of the hot salted water into the flour mixture. Mix on the lowest KitchenAid setting (Stir) for approximately 2 minutes, stopping to scrape down the sides of the bowl with a silicone spatula if needed.
Add the remaining water.
- Carefully pour in the remaining 1/2 cup of hot salted water. Increase the mixer to Speed 2 and continue mixing for approximately 2 minutes, or until the ingredients come together into a cohesive dough.
Knead the dough.
- Turn off and unplug the stand mixer. Transfer the dough to a clean work surface and knead by hand for approximately 2 to 3 minutes, until smooth and pliable.
Rest the dough.
- Shape the dough into a ball, return it to the mixing bowl, and cover with a clean kitchen towel. Allow it to rest for 5 minutes. Meanwhile, preheat a flat skillet or comal over medium heat. Do not add oil or butter.
Divide into portions.
- Remove the rested dough from the bowl and divide it into approximately 10 to 14 equal portions, depending on your preferred tortilla size. Roll each portion into a small ball and keep the remaining dough balls covered while working.
Roll out the tortillas.
- Take one dough ball and flatten it slightly with your palm. Using a rolling pin, roll from the center outward, turning the dough slightly between passes to create a circular shape. Continue rolling until the tortilla is thin enough that you can faintly see the work surface through it, but still strong enough to lift without tearing.
Cook the first side.
- Carefully transfer the rolled tortilla to the preheated, dry skillet or comal. Cook for approximately 30 to 45 seconds, or until bubbles begin forming on the surface.
Flip and finish cooking.
- Using a spatula, carefully flip the tortilla and cook the second side for approximately 30 seconds, or until cooked through with a few light golden-brown spots. Adjust the cooking time as needed depending on the tortilla's thickness and the temperature of your pan.
Keep warm and repeat.
- Immediately transfer the cooked tortilla to a plate and cover with a clean kitchen towel to help retain warmth and moisture. Repeat with the remaining dough balls, stacking each finished tortilla beneath the towel until the batch is complete.
Serve.
- Serve the homemade flour tortillas warm with your favorite taco, burrito, quesadilla, or wrap fillings.
Video
Notes
- Dough consistency: The finished dough should be soft, smooth, and pliable. If it’s too dry to come together, add warm water 1 teaspoon at a time. If excessively sticky after kneading, work in a very small amount of additional flour.
- Rolling thickness: Roll the tortillas as thinly as possible without tearing. You should be able to faintly see the work surface through the dough.
- Dough shrinking: If the dough keeps springing back while rolling, cover it and allow it to rest for another 5 to 10 minutes before trying again.
- Pan temperature: Medium heat is a good starting point. Adjust as needed to prevent the tortillas from burning before cooking through.
- Keeping tortillas soft: Transfer each cooked tortilla directly to a plate beneath a clean kitchen towel. This helps retain warmth and moisture.
- Allergy information: This recipe contains wheat and gluten. It is dairy-free and vegan when made with suitable ingredients. Always check packaging and allergen information, particularly when preparing food for someone with a severe milk allergy.
- No stand mixer? The dough can also be prepared by hand. Mix the ingredients with a sturdy spoon, then knead until smooth once cool enough to handle safely.
Storage
- Refrigerator: Allow tortillas to cool completely, then store in an airtight container or sealed food-safe bag in the refrigerator for approximately 3 to 4 days.
- Freezer: Cool completely, separate with parchment paper if desired, and freeze in a freezer-safe bag or container for approximately 2 to 3 months for best quality.
- Reheating: Warm briefly in a dry skillet over medium-low heat or microwave beneath a slightly damp paper towel until soft and flexible.
Related Recipes
Join our community!
It’s so important to be part of a community that not only understands you but that champions you, encourages, challenges and cheers you on. We couldn’t find one – so we created it instead!
Join the Side Hustle Homemaker’s team Sam, Mona and I over at the Recipes, Homesteading & More! Facebook group for Food Blogging Tips, Homesteading and Homemaking content and encouragement!
We’re 3 very different US/UK military families who met and became instant forever friends.
We created the group to share real life around recipes, food blogging, homemaking, military life, homesteading and more. Head on over, say Hi, share your recipes, homemaking tips and gain some friends and knowledge along the way!
The Takeaway
Making homemade flour tortillas has become one of those kitchen skills I’m so happy I’ve finally gotten the hang of! Growing up in a Mexican-American family, tortillas were always part of our cooking, but learning to make them confidently myself has taken a little practice.
Now I love knowing I can make a fresh batch with just four inexpensive ingredients and my trusty KitchenAid. They’re soft, delicious, dairy-free, and perfect for so many of our family meals.
I hope you’ll give them a try, and don’t worry if your first few aren’t perfectly round. Mine weren’t either!
What to Try Next?!

Share & Rate This Recipe!
If you tried this recipe, please share your feedback with a quick star rating or comment below. And if you loved it, don’t forget to share it with friends and family too!
Published in collaboration with Far From The Farm – part of the Side Hustles Homemakers Team!



2 Comments